
File Exchange Service - How to Use
This page explains how the file exchange service in Memority works and how to set it up for secure file transfers.
Service description
The file exchange service allows you to:
Retrieve files that Memority generates (e.g., data exports, custom reports, and logs).
Upload files that Memority uses for processing (e.g., data imports).
You can upload or retrieve files manually or automatically. Each client tenant stores files in its corresponding directories.
The file exchange service uses FTP technology. For security reasons, the service is only accessible through an asymmetric key authentication mechanism. The generation of these keys is detailed below.
Hierarchical structure
The file exchange service organizes files into three folders:
input folder — for files that the customer uploads.
Read/write access
output folder — for files that Memority uploads.
Read-only access
support folder — for files attached to support requests.
Read/write access
Retention period
Unless you request a different policy, files that Memority generates remain available for one week after upload.
When you upload files, Memority archives them as soon as one of Memority services processes them.
Security
The file exchange service uses asymmetric key authentication based on the SSH v2 protocol.
After subscribing to the service, you generate your own key pair:
The private key remains under your control. It guarantees authentication and must never be shared with a third party.
The public key is sent to the Memority team, who install it on the file exchange service.
The following sections describe how to generate these keys.
Prerequisites
Generate a key pair
You can generate an SSH key pair using one of the following tools:
ssh-keygen (on UNIX or Linux systems)
PuTTYgen (on Windows systems)
Most Linux distributions (e.g., CentOS, Red Hat) include ssh-keygen by default.
Generate a key pair with ssh-keygen:
Open your terminal.
Run the following command:
ssh-keygen -t rsaSpecify the location where you want to create the keys.
Example:
/root/memority-ftp_customerKeyEnter a passphrase (a password required to read the key).
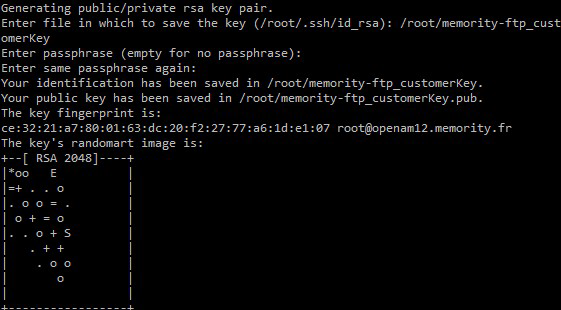
Retrieve the public key you just created and send it to the Memority team via the Memority Support Portal.
Send only the public key. Keep your private key and passphrase secure.
In this example, the public key is stored in:
/root/memorityftp_customerKey.pubGenerate a key pair with PuTTYgen
PuTTYgen is a graphical tool for generating SSH keys on Windows. You can download it from the official PuTTY website. The program is an executable file and does not require installation.
To create your key pair:
Launch PuTTYgen.
Select SSH2 RSA as the key type.
Set the key length to 2048 bits.
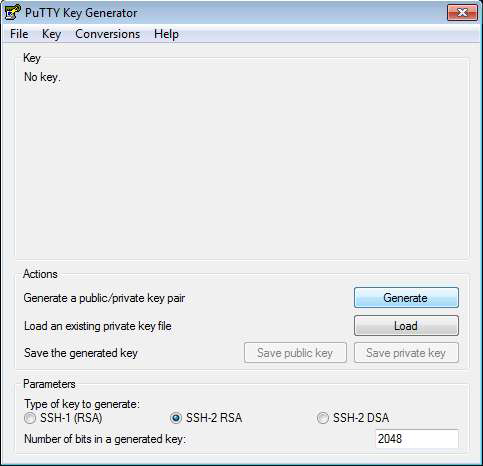
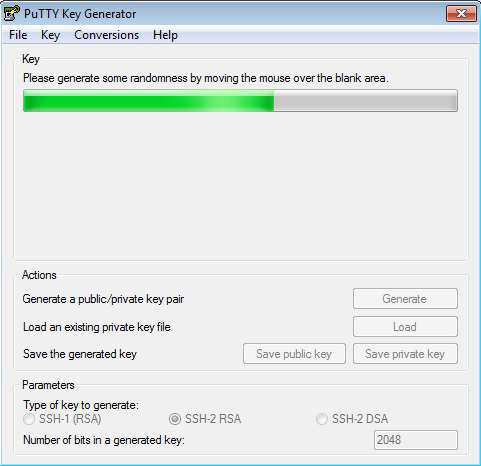
Click Generate, then move your mouse around the window to create randomness for the key.
Enter a passphrase to protect the key.
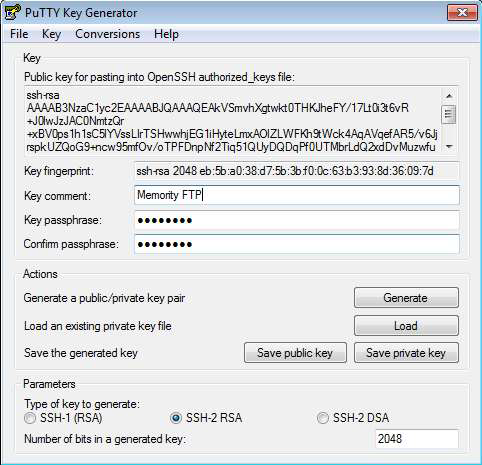
Click Save public key and Save private key to store each key.
PuTTYgen saves the private key in .ppk format by default. Some FTP clients may require another format.
Optional: To export the key in OpenSSH format, go the Conversions menu and select Export OpenSSH key.
Send the public key to the Memority team via the Memority Support Portal.
Accessing the service
This section explains how to upload and retrieve files through the file exchange service.
You can use either a graphical FTP client on Windows or a command-line client on UNIX or Linux.
Prerequisites
Before you connect, make sure you have:
An FTP client that supports the SFTP protocol.
A username that the Memority team gives you when you subscribe to the service.
A pair of SSH keys that you created earlier.
Use your private key to log in to the FTP service.
Send your public key to the Memority team so they can give you access.
Connection settings
Configure your FTP client with the following details:
Environment | Host Name | Port | Protocol | Authentication |
|---|---|---|---|---|
Staging |
| 22 | SFTP | Private key (username provided by Memority) |
Production |
| 22 | SFTP | Private key (username provided by Memority) |
If your company’s security policy requires it, connect through an IPsec tunnel between your system and Memority.
Connect with a graphical FTP client
This section explains how to connect to the file exchange service using a graphical FTP client such as WinSCP or FileZilla.
This guide uses WinSCP as an example.
Steps
Open WinSCP
.png?inst-v=0d3bb6fe-37f4-4da8-aa25-d889db81ab06)
In the Host name field, enter the server domain:
share.<tenant>.memority.comIn the Username field, enter your client ID (for example,
customer1).In the Port number field, enter:
22
.png?inst-v=0d3bb6fe-37f4-4da8-aa25-d889db81ab06)
Click on Advanced….
.png?inst-v=0d3bb6fe-37f4-4da8-aa25-d889db81ab06)
In the menu on the left, click on Authentication
In the Private key file field, browse your private key and select it. WinSCP then loads your private key for this connection.
.png?inst-v=0d3bb6fe-37f4-4da8-aa25-d889db81ab06)
Click OK.
Finally, click Connection
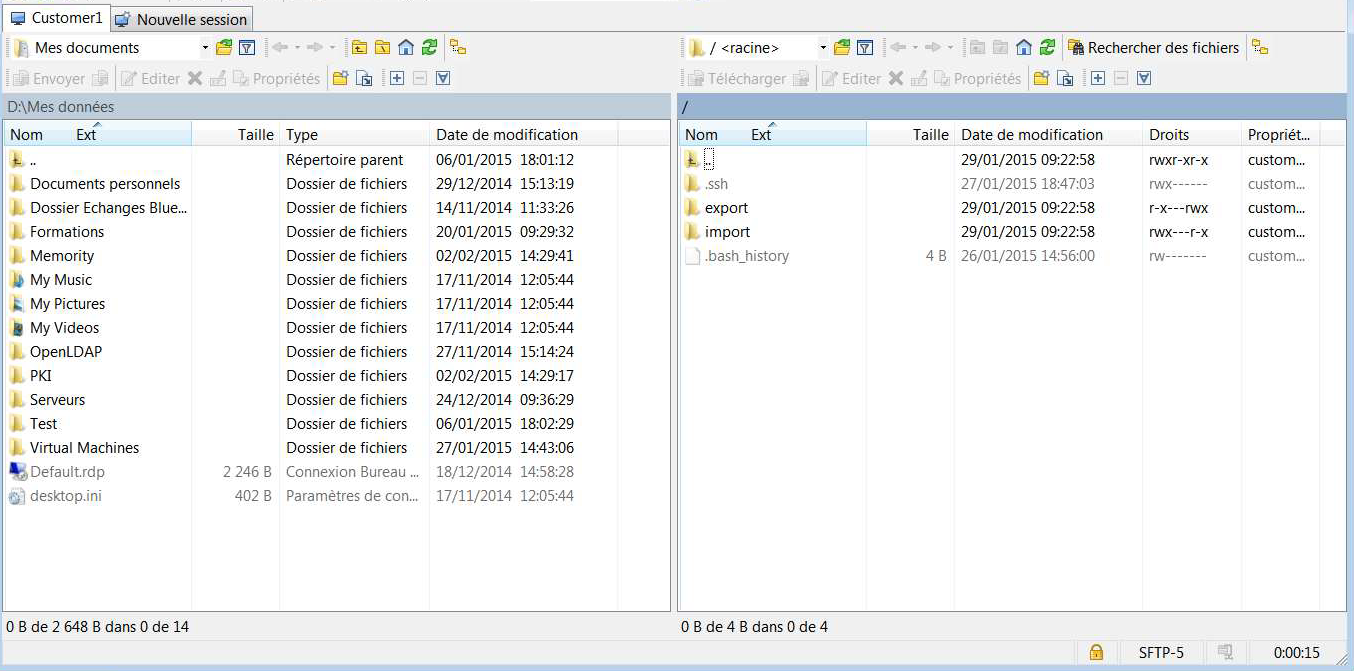
When the connection opens, the left panel displays your local folders, and the right panel displays your home directory on the Memority server.
Connect with a command-line FTP client
This section explains how to connect to the file exchange service using a command-line FTP client such as the Linux sftp utility.
Steps
Open your terminal
Enter the following command to connect:
sftp -oIdentityFile=<private_key> -oPort=22 <username>@share.<tenant>.memority.comWhere:
<private_key>is the path to your private key.<username>is the username provided by the Memority team.
Example:
sftp -oIdentityFile=customer1.ppk -oPort=22 customer1@share.customer1.memority.comWhen the connection opens, you are in your home directory on the Memority server.