
Memority integration with IntelliJ
Installation
Before starting to configure Memority with IntelliJ, you need to install and configure the IDE.
| 1 | Download and install the last version of IntelliJ IDEA Community Edition | |
| 2 | Download and install Memority Integration Tool plugin | |
| 3 | Download and install JDK
| 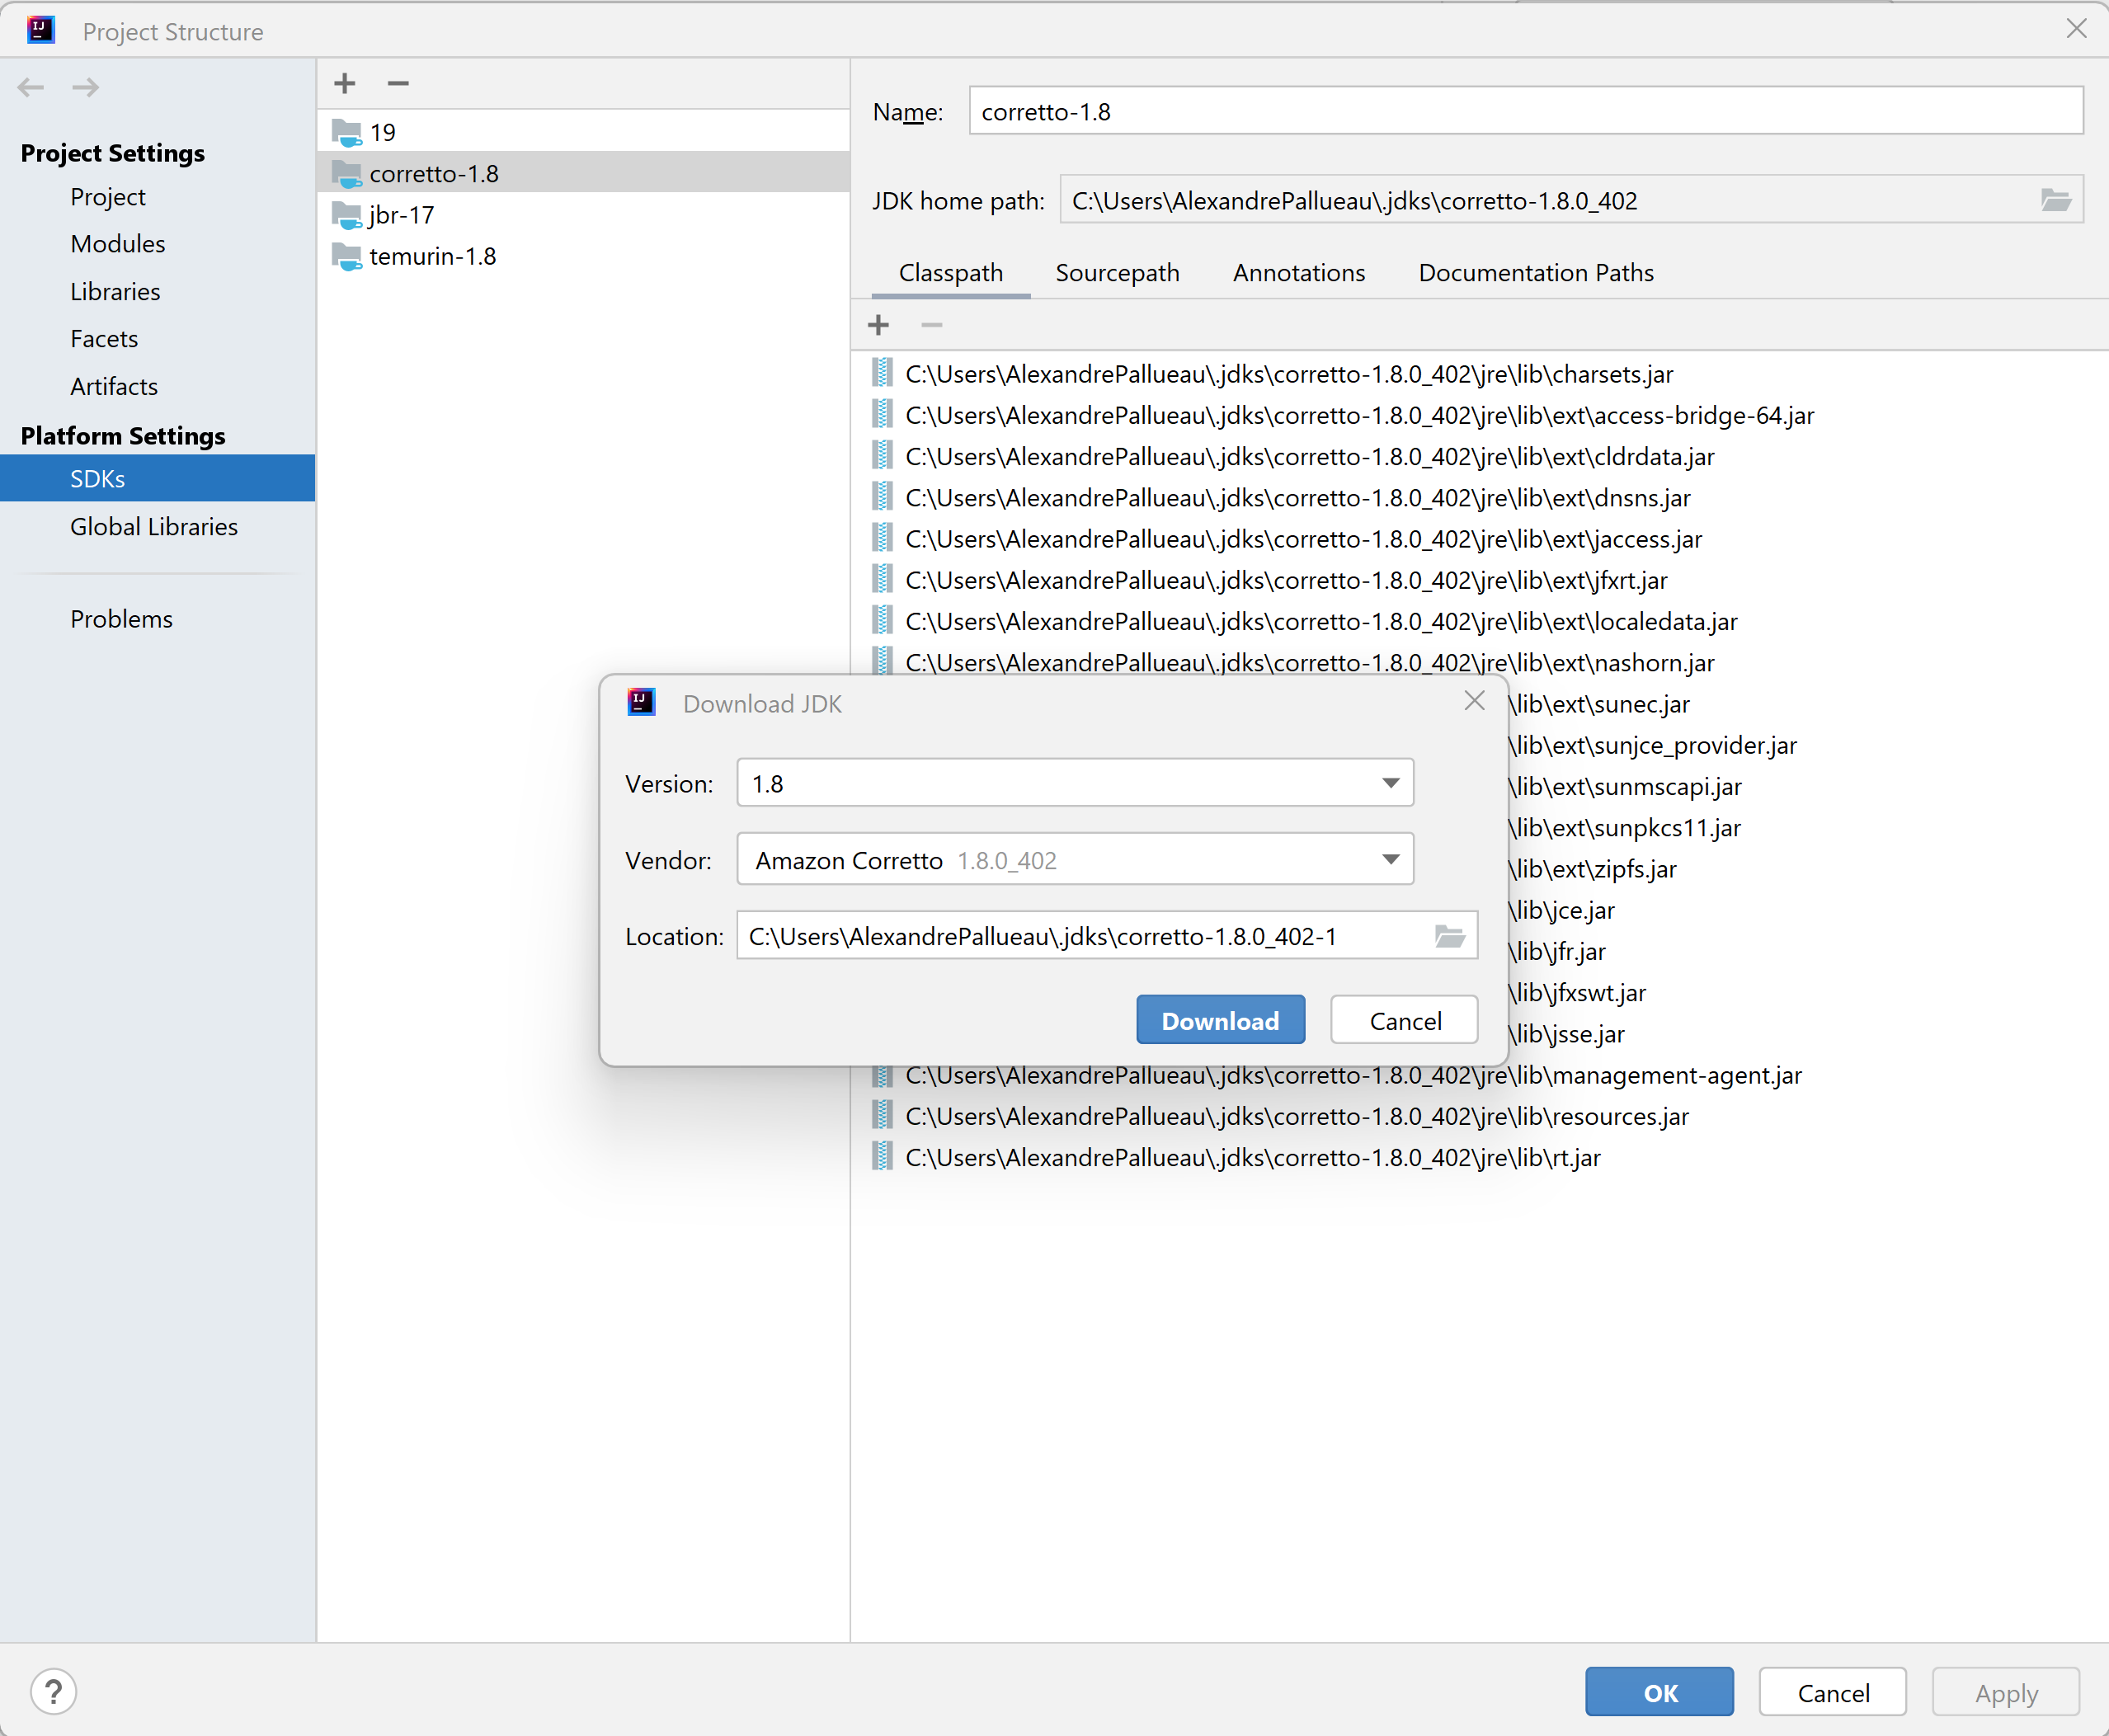 Download JDK |
| 4 | Download and install GIT
|
Configuration
Project presentation
The file storage adheres to a predefined hierarchy in IntelliJ, and all customizable configurations are located within services. They are primarily divided into three categories: im, am, shared. Each service is dedicated to a specific configuration:
IM contains services dedicated to data management
IDM service handles the object life cycle, the attribute definition etc.
BUM service deals with configurations related to features present on the portal.
SYNC is responsible for provisioning configurations.
AM contains service dedicated to access management
AMCP service handles authentication configurations and federation options
SHARED contains transversal services
i18n service is dedicated to managing configurations related to translations of portal labels.
NTF service manages configurations associated with notifications.
REP service stores reporting configurations.
AUD service handles configurations related to audit events on the portal.
TCF service handles theme and tenant configurations.
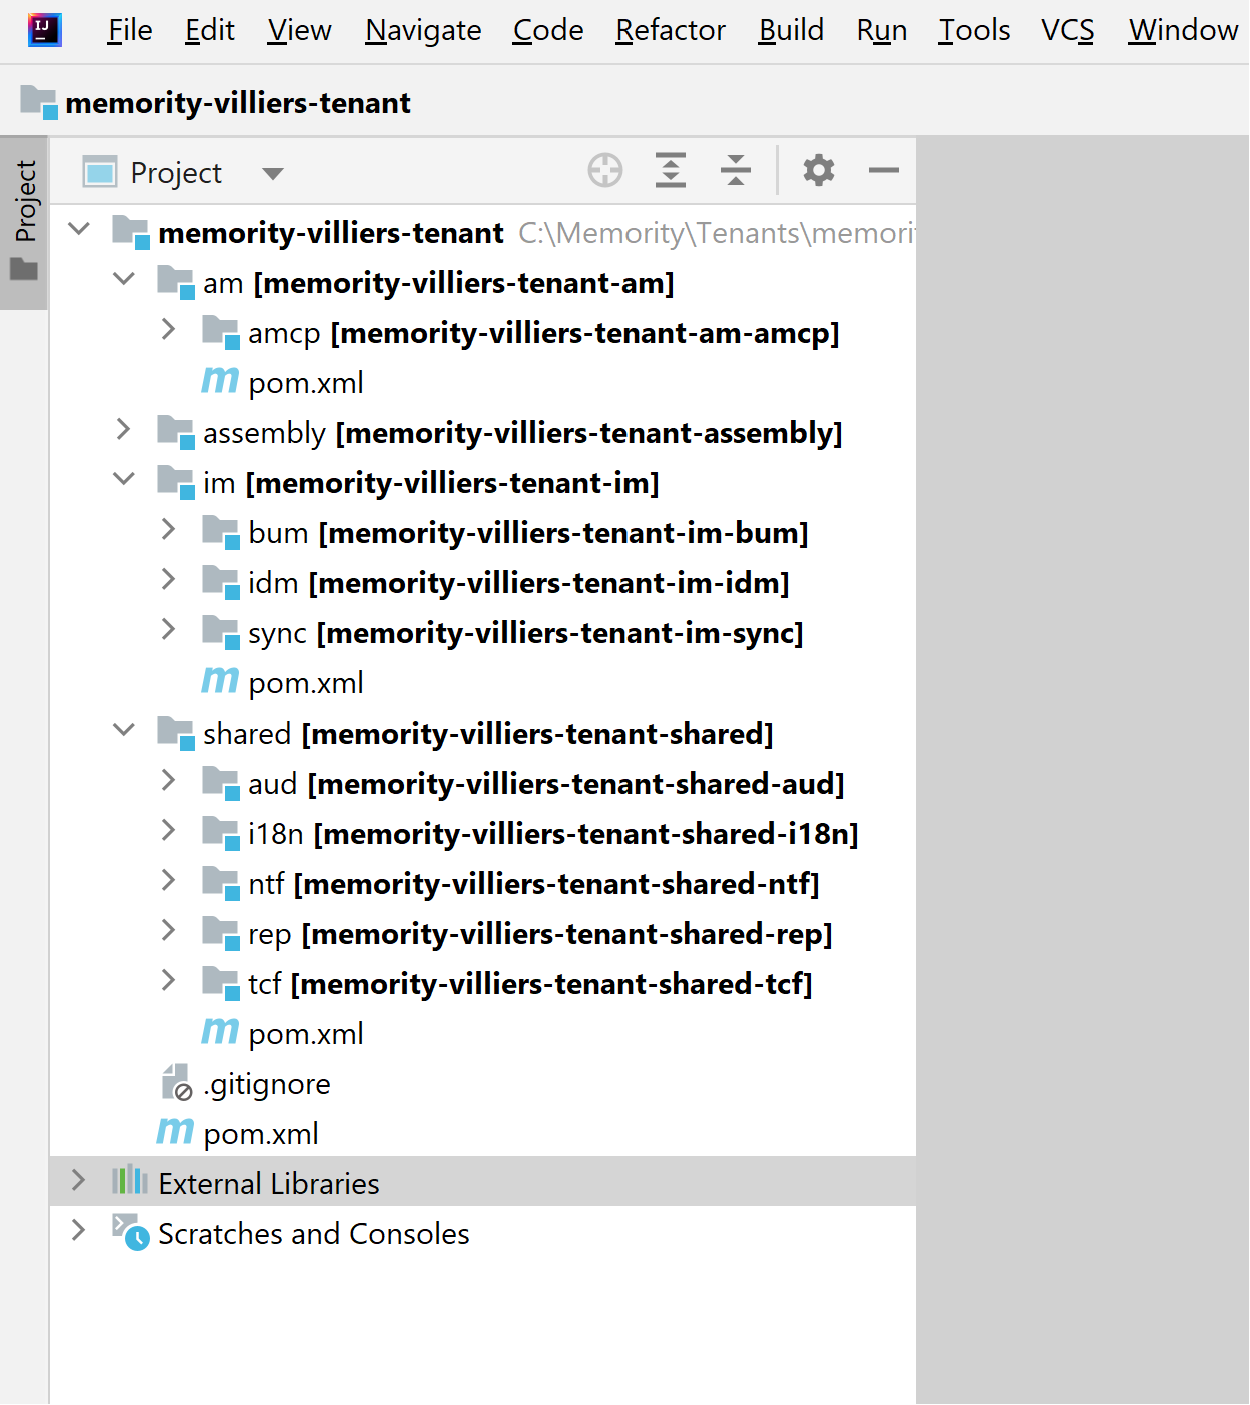
Repository tree by default
Define a configuration
To create new configuration on IntelliJ, you need to create a XML file into the service you want to configure, under /src/main/resources. You can add directories to sort your configurations into a service.
Each file must contain only one configuration. As a best practice, it is advisable to name the file based on the configuration's identifier configured.
If a file's name starts with an underscore, the configuration will be excluded from Maven build and won't be in generated configuration. It could be useful to keep support configuration or tests.
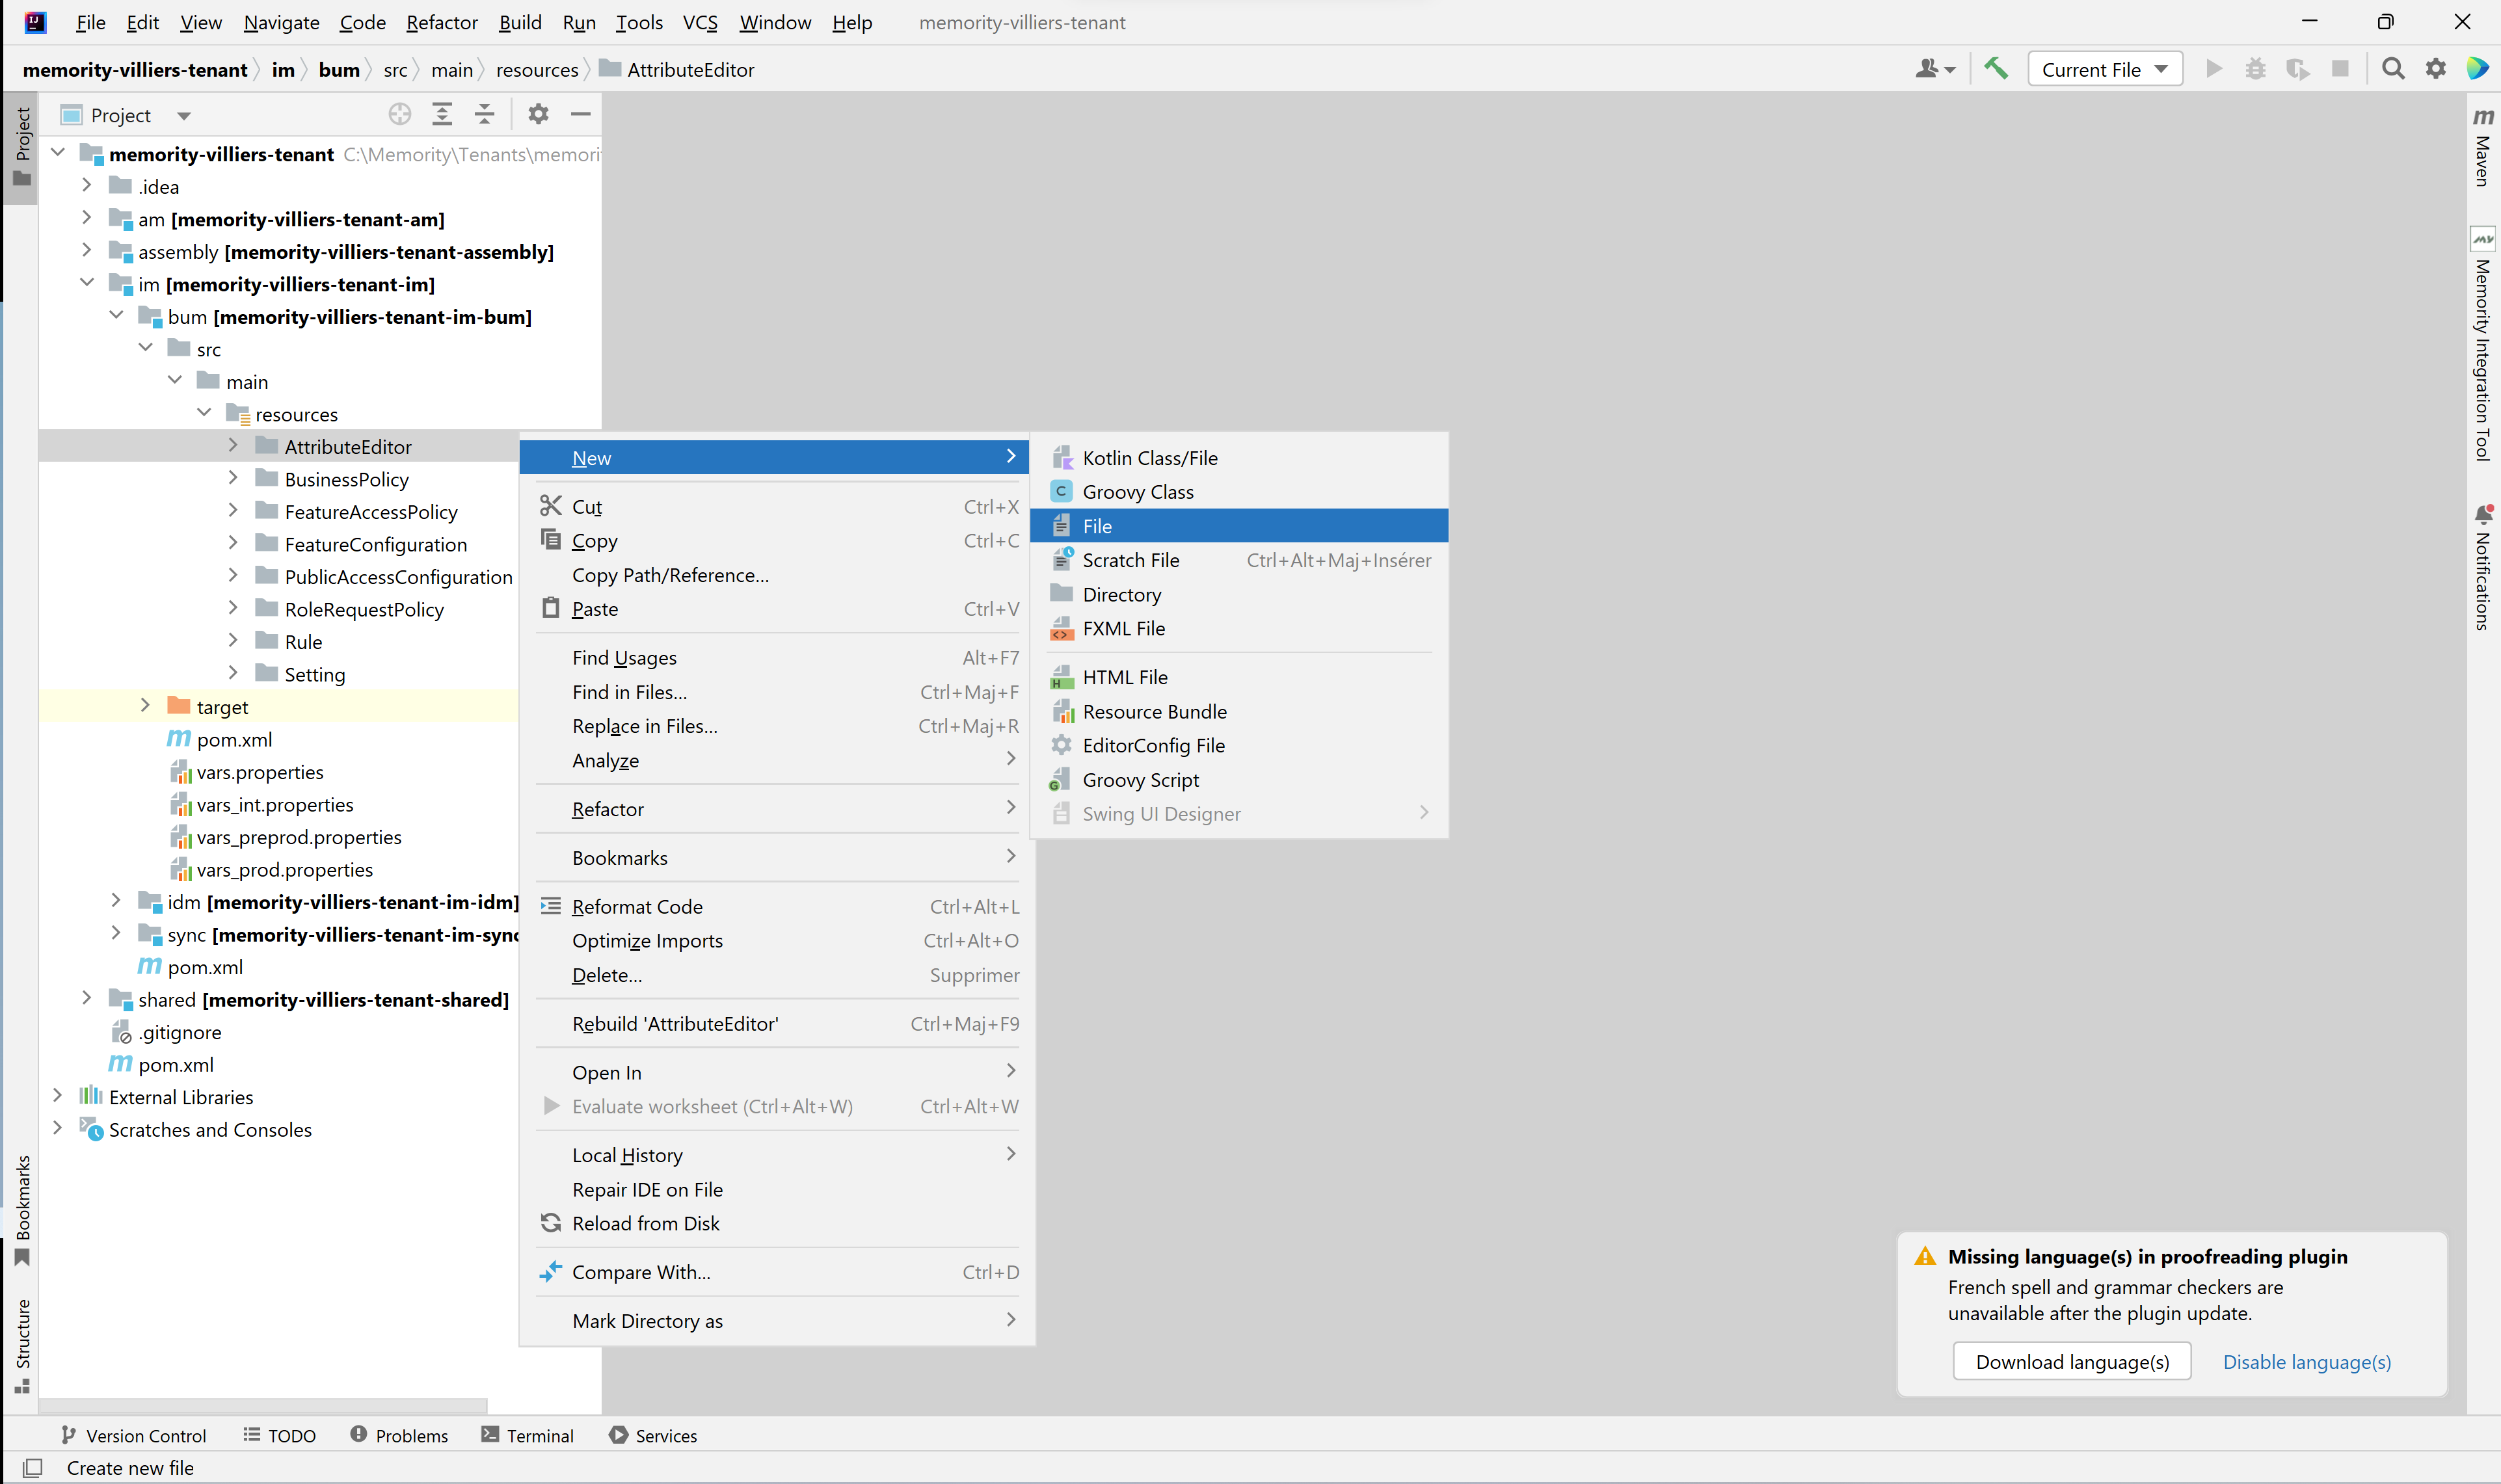
Creation of a file
The IDE uses XML Schema Definition (XSD) to establish validation checks on an XML file. It creates a schema based on the elements and attributes of an XML file.
IntelliJ IDEA provides the ability to automatically complete your XML code; to do so, simply press CTRL + Enter.
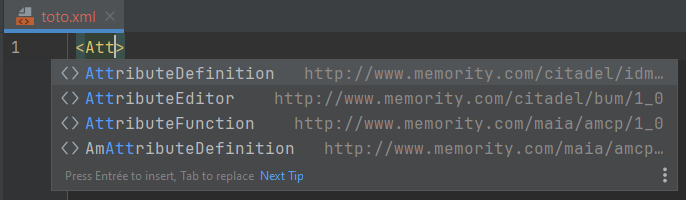
Before the shortcut
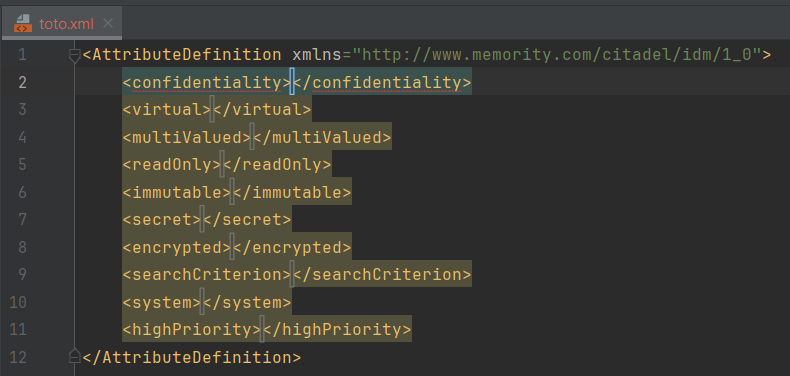
After the shortcut
To configure groovy script into a feature, we highly recommend to use CDATA tag to avoid any XML syntax error.
Example of groovy script integrated in XML configuration
XML
|
You can also define your groovy script in an external groovy file that will be integrated to your XML configuration on Maven build.
To do that, create a groovy file to set your script code and use the tag <xi:include> to define the file inclusion to do:
href: the relative path to the file to include (relative to the file where the include is performed)
parse: indicate to parse the included file as text to avoid any SML syntax error
The groovy file should starts with an underscore to be exclude of Maven build.
Example of groovy script included in XML configuration
XML
|
Example of groovy file
GROOVY
|
Environment's variables
For each service, properties files exists to handle environment's variables that will be included to configuration files on Maven build.
For example, the setting idm.system.user.email define the sender's email for notification sending triggered by IDM service. This value is by default set to no-reply@memority.fr on preproduction environment and no-reply@memority.com on production environment.
To handle this a unique configuration, we will use environment properties in the setting and define the value to set in properties files.
The inclusion in setting file is done with @{%VARIABLE_KEY%}
The value is defined in properties files as %VARIABLE_KEY%=%VARIABLE_VALUE%
Setting idm.system.user.email
XML
|
IDM vars_preprod.properties
JAVA
|
IDM vars_prod.properties
JAVA
|
Code style
You can format your configurations according to predefined style conventions with option "Reformat code" (CTRL+Shift+ALT+L) to automatically adjusts the indentation, spacing, and other aspects of code formatting to ensure a consistent and professional presentation.
For XML style, we strongly advise to set the following options for XML code style (jetbrains://Idea/settings?name=Editor--Code+Style--XML):
Set Wrap attributes to "Do not wrap"
Uncheck checkbox "Wrap text"
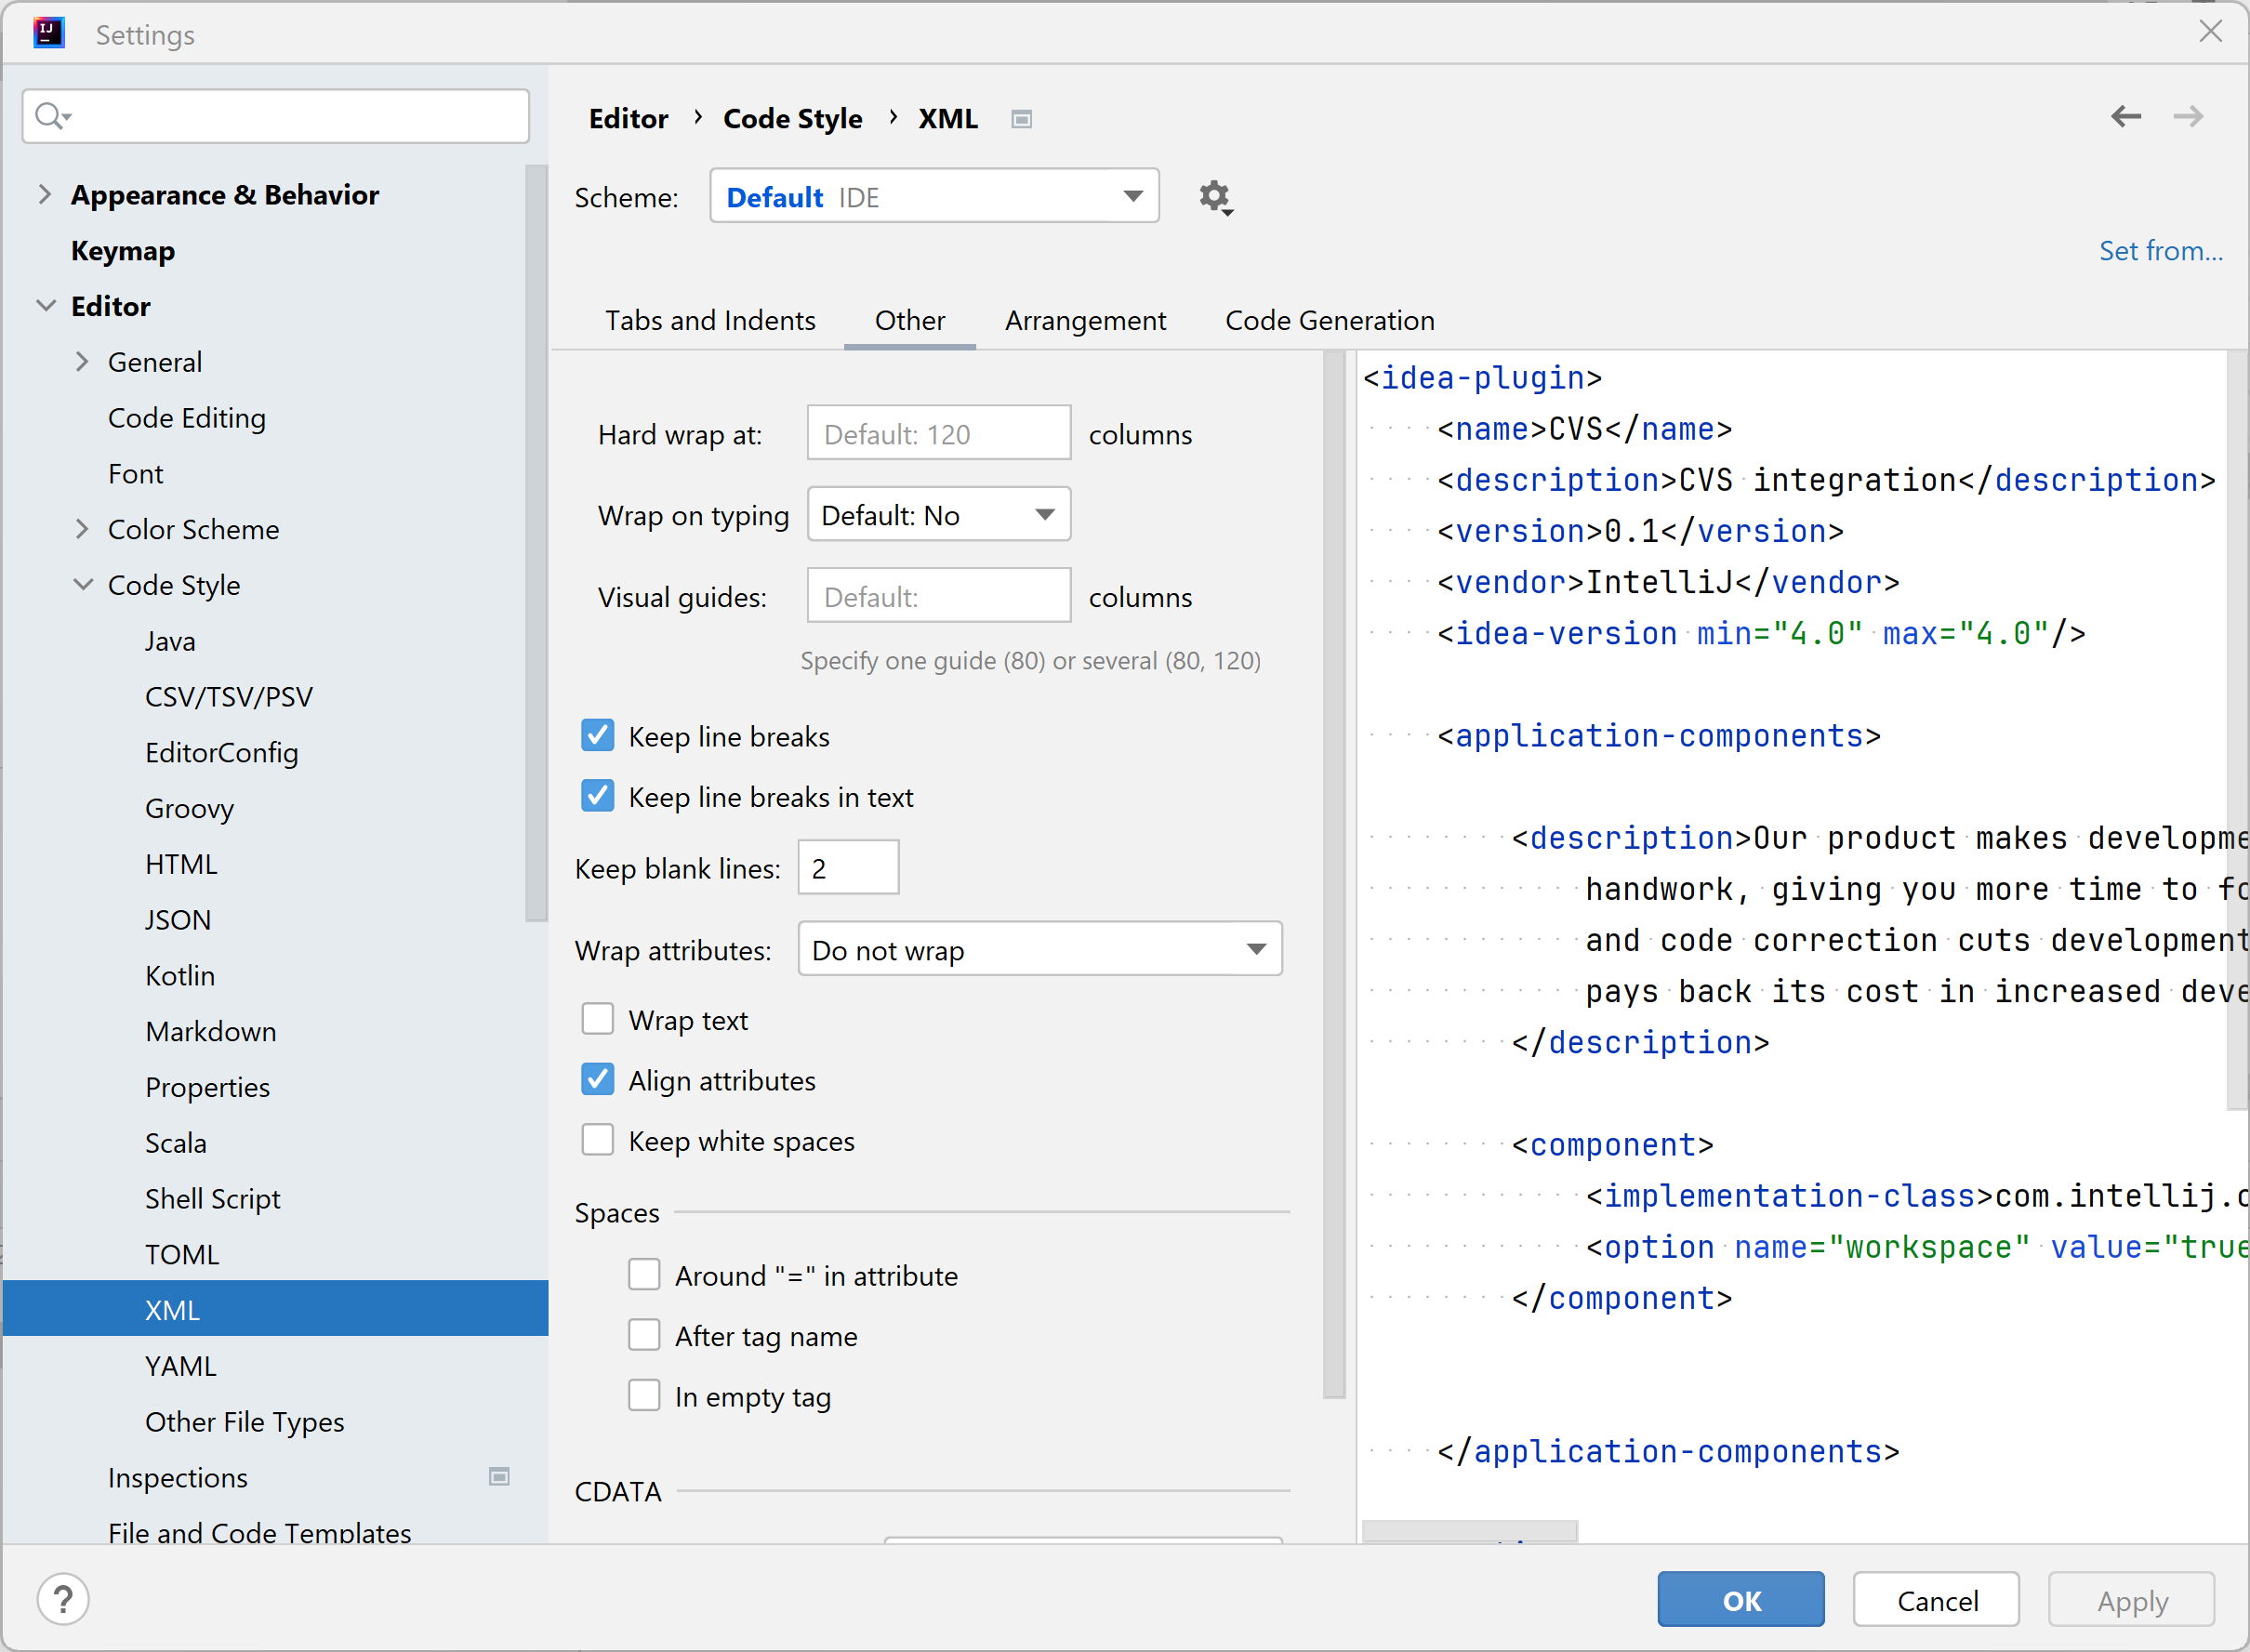
XML code style configuration
Deployment
Initialize a new project
To manage a project with IntelliJ and Memority Integration Tool, you need to create and initialize a project thanks to Maven archetypes.
Follow these steps to initialize your project:
Create a new project in IntelliJ | 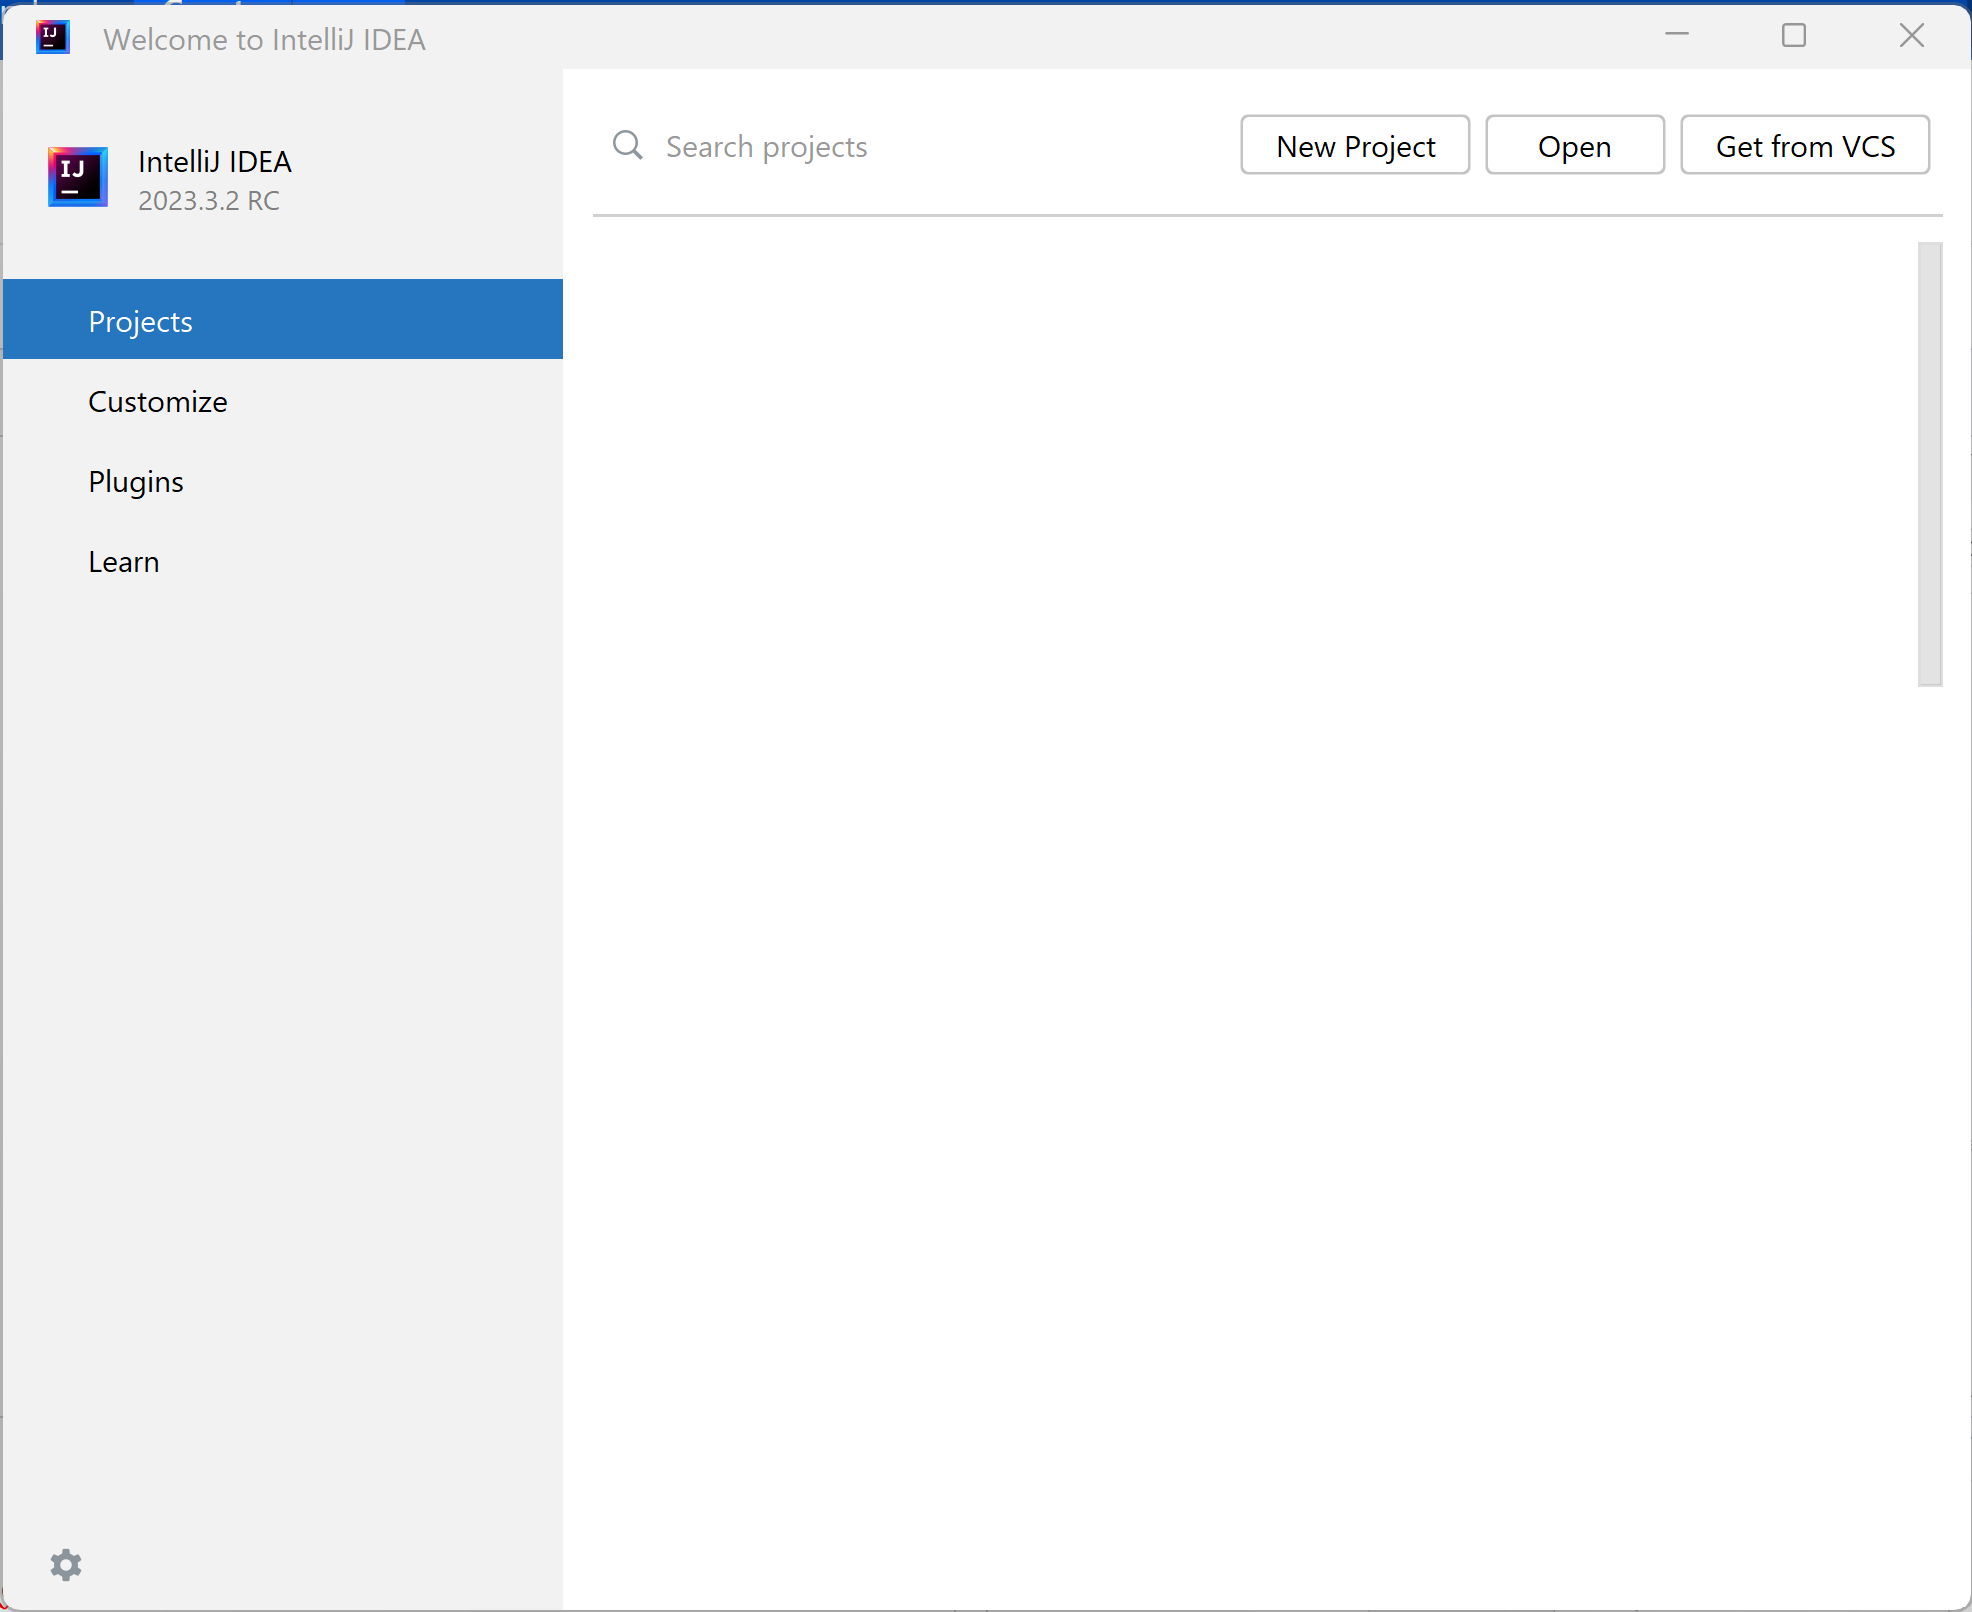 New project on the intellij idea |
Use Maven Archetype option and complete the form:
| 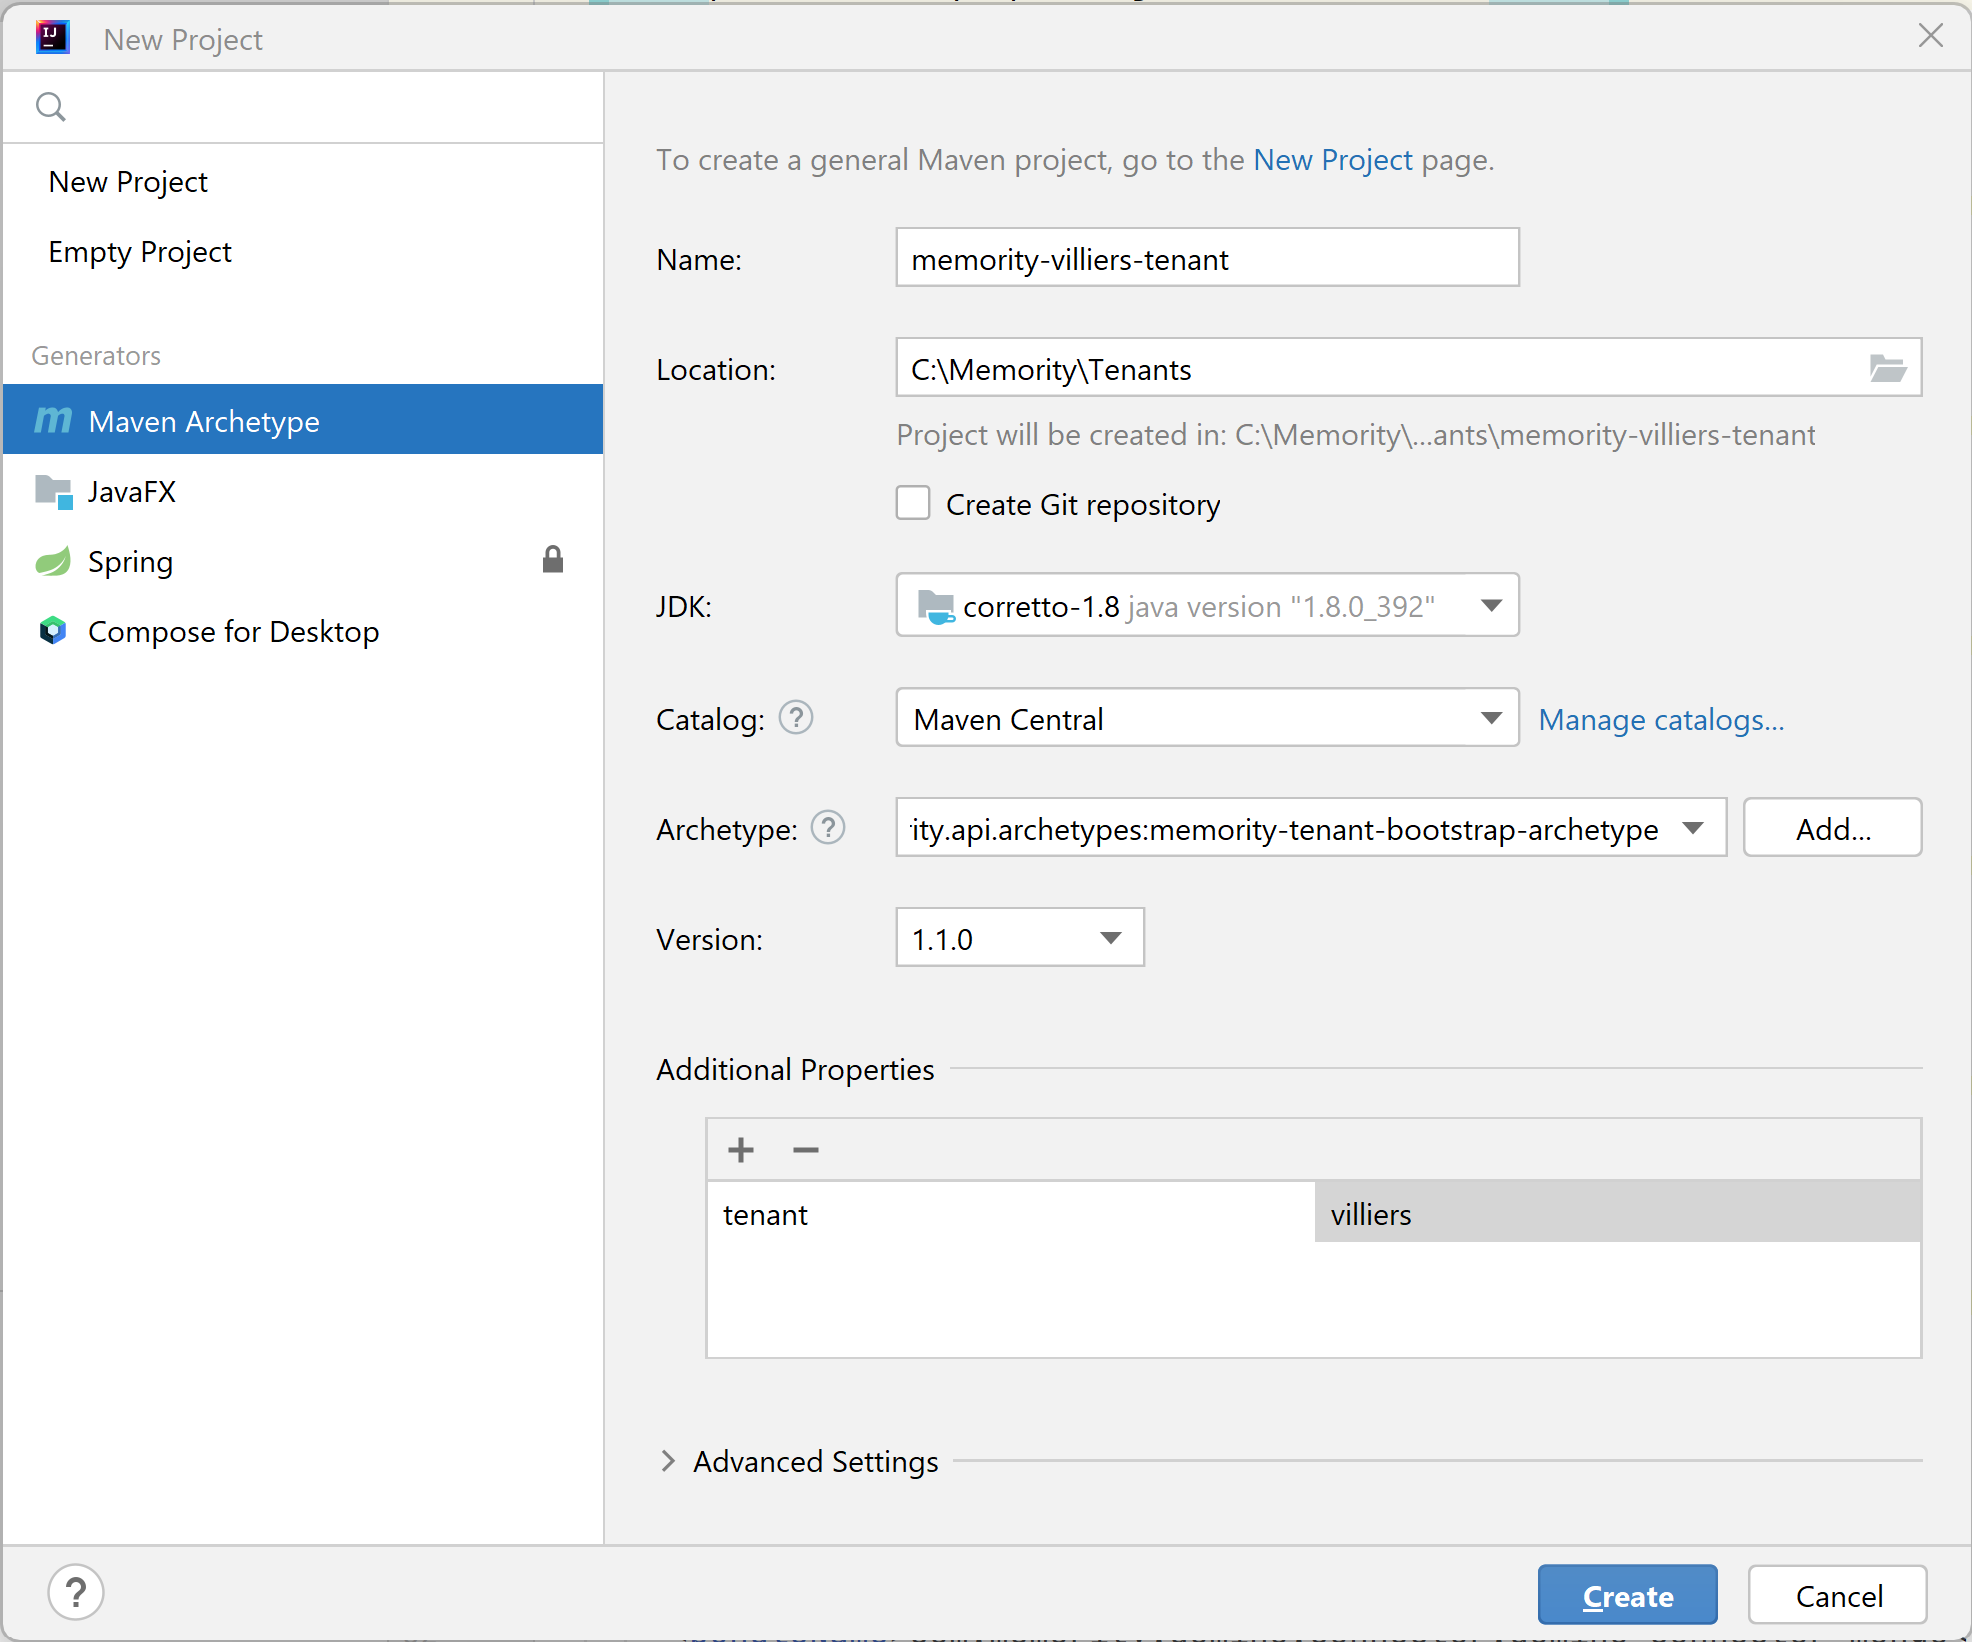 Complete the form |
Once your project created, open Memority Integration Tool panel and click "Initialize project" in "Connectors" menu. Fill in the form to complete the initialization:
| 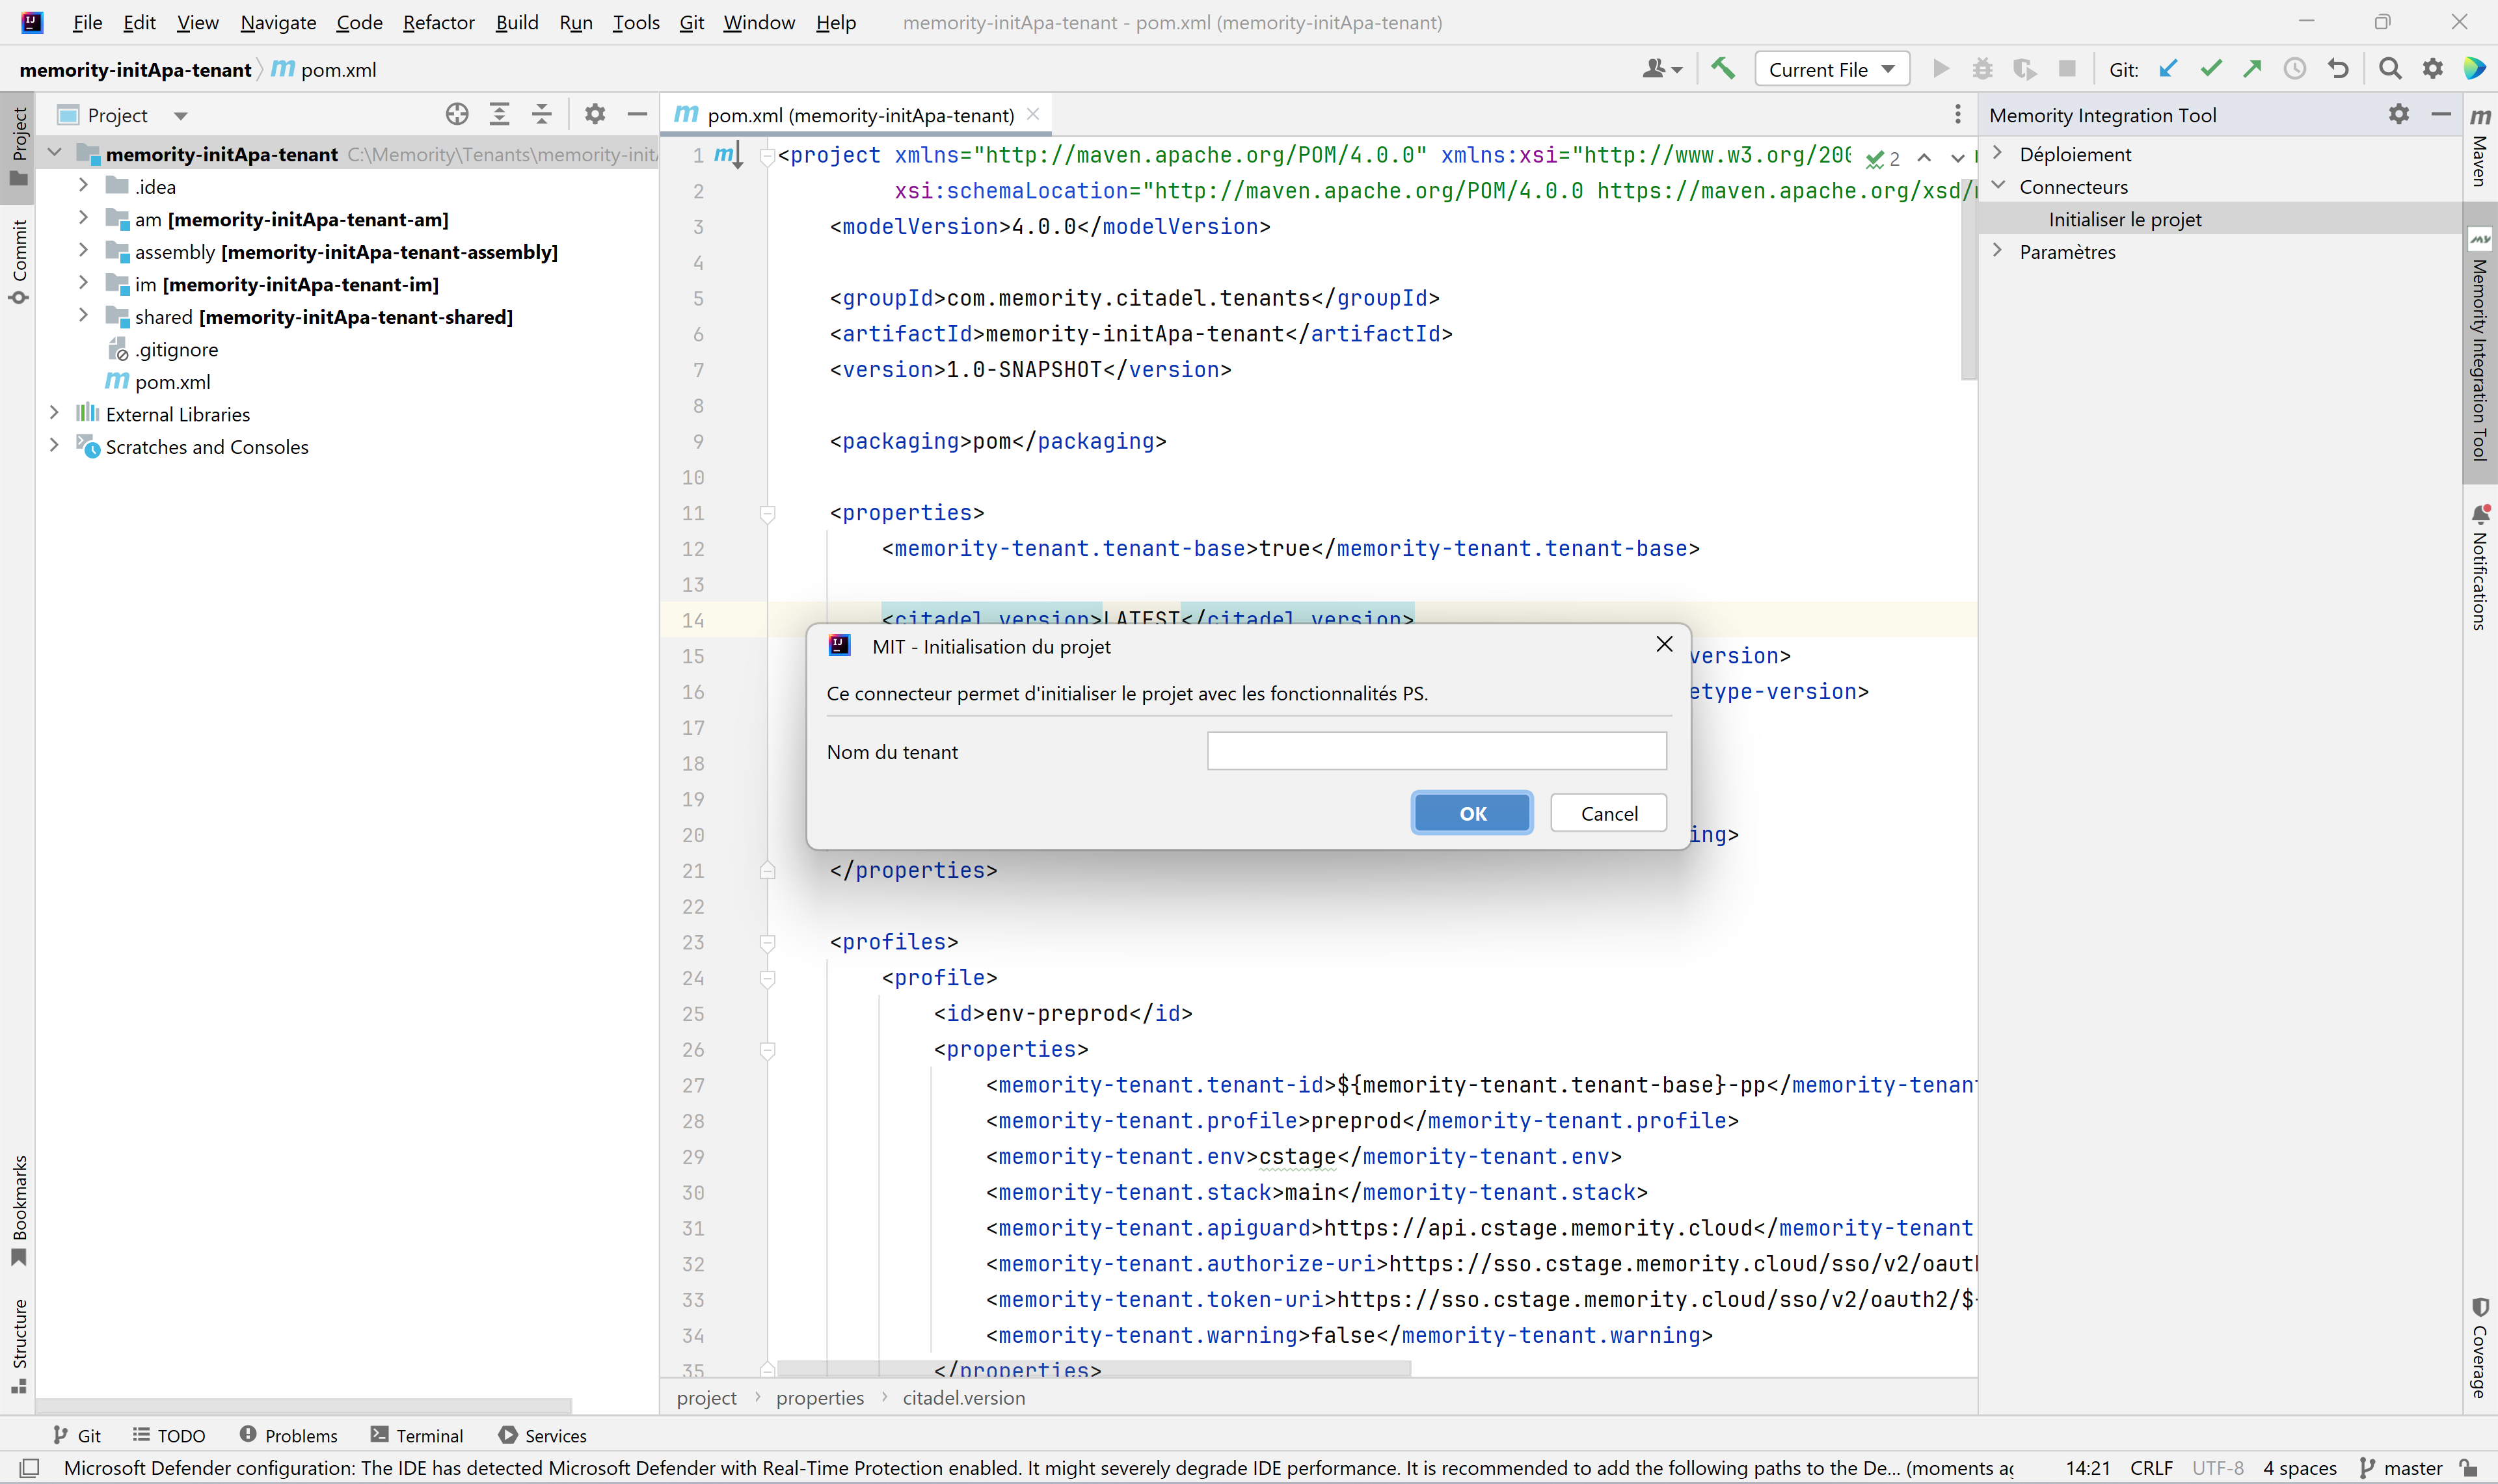 |
Update the pom.xml file at project’s root to update profiles URL lines 24 to 50. Replace %TENANT_FQDN% in next examples by the client’s FQDN decided with the client.
|
XML
|
Build
To build your tenant and get configurations to import with right environment's variables, you first need to select your Maven profiles.
Go to Maven panel and collapse "Profiles" menu to select profiles:
generate-groovy-hints: this profile should always be selected to build groovy auto completion with attributes found in your configuration
Your work environment: select the environment you want to build for, by default the initialized project comes with two environments "env-preprod" and "env-prod". These environments are defined in project's pom.xml.
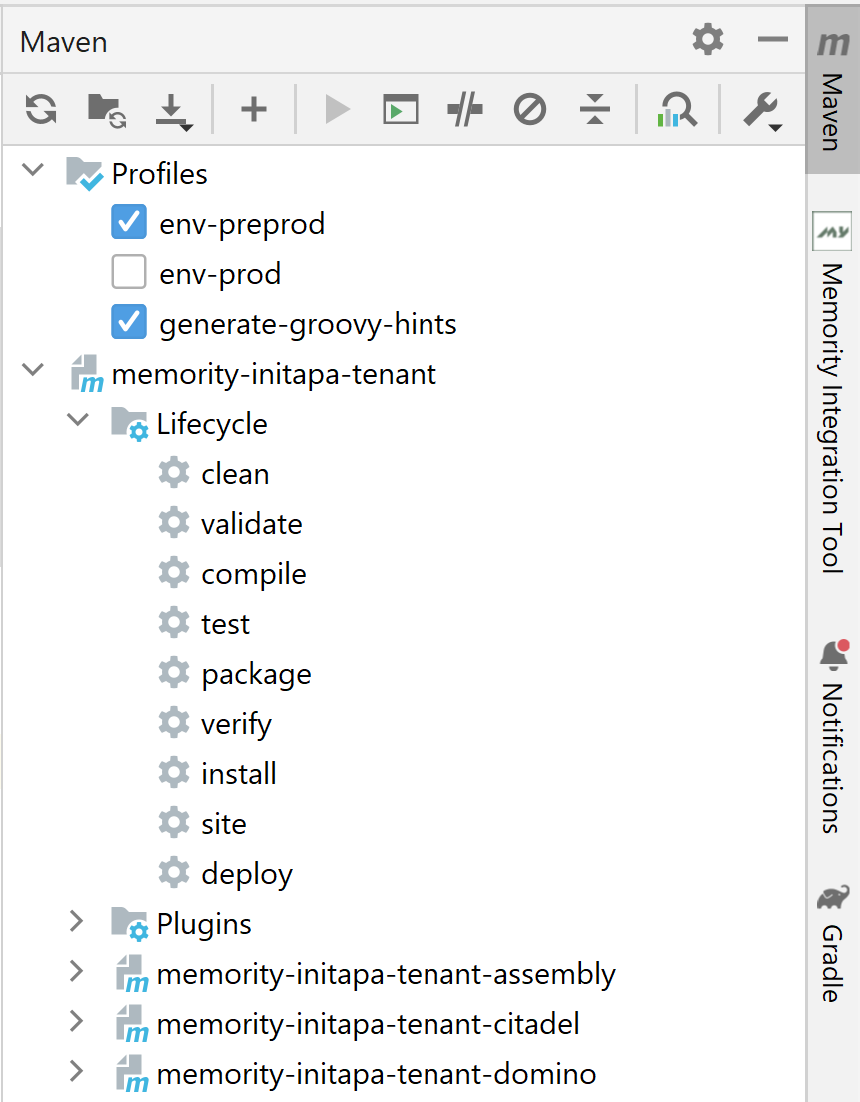
Choose the maven profil
Once the profile selected, you are ready to work with this environment. You can use the Memority Integration Tool to build and import configurations on Memority platform (see Memority Integration Tool).
You can also use Maven package option in "Lifecycle" folder to build configurations files to import manually in administration portal.
Import configurations
There is several options to import configurations to Memority tenant's:
Memority Integration Tool (strongly advised)
Administration portal
API
Memority Integration Tool
The Memority Integration Tool (MIT) on IntelliJ is designed to facilitate project management and the import/export of projects to tenants. Users can easily and quickly import configurations directly to the tenant. Indeed, you have the option to import all configurations of a service in a single operation or to import a configuration per file using the options provided by the plugin. (see Memority Integration Tool ).
Administration portal
You can manually import and export configurations through the administration portal thanks to the dedicated feature "Configurations" in menu "System".
To import a configuration for a dedicated service, select it and upload your configuration file in "Import" tab. The import tab allow you to select which kind of configuration you want to import.
Configurations files can be get from "assembly" directory in IntelliJ after a Maven build.
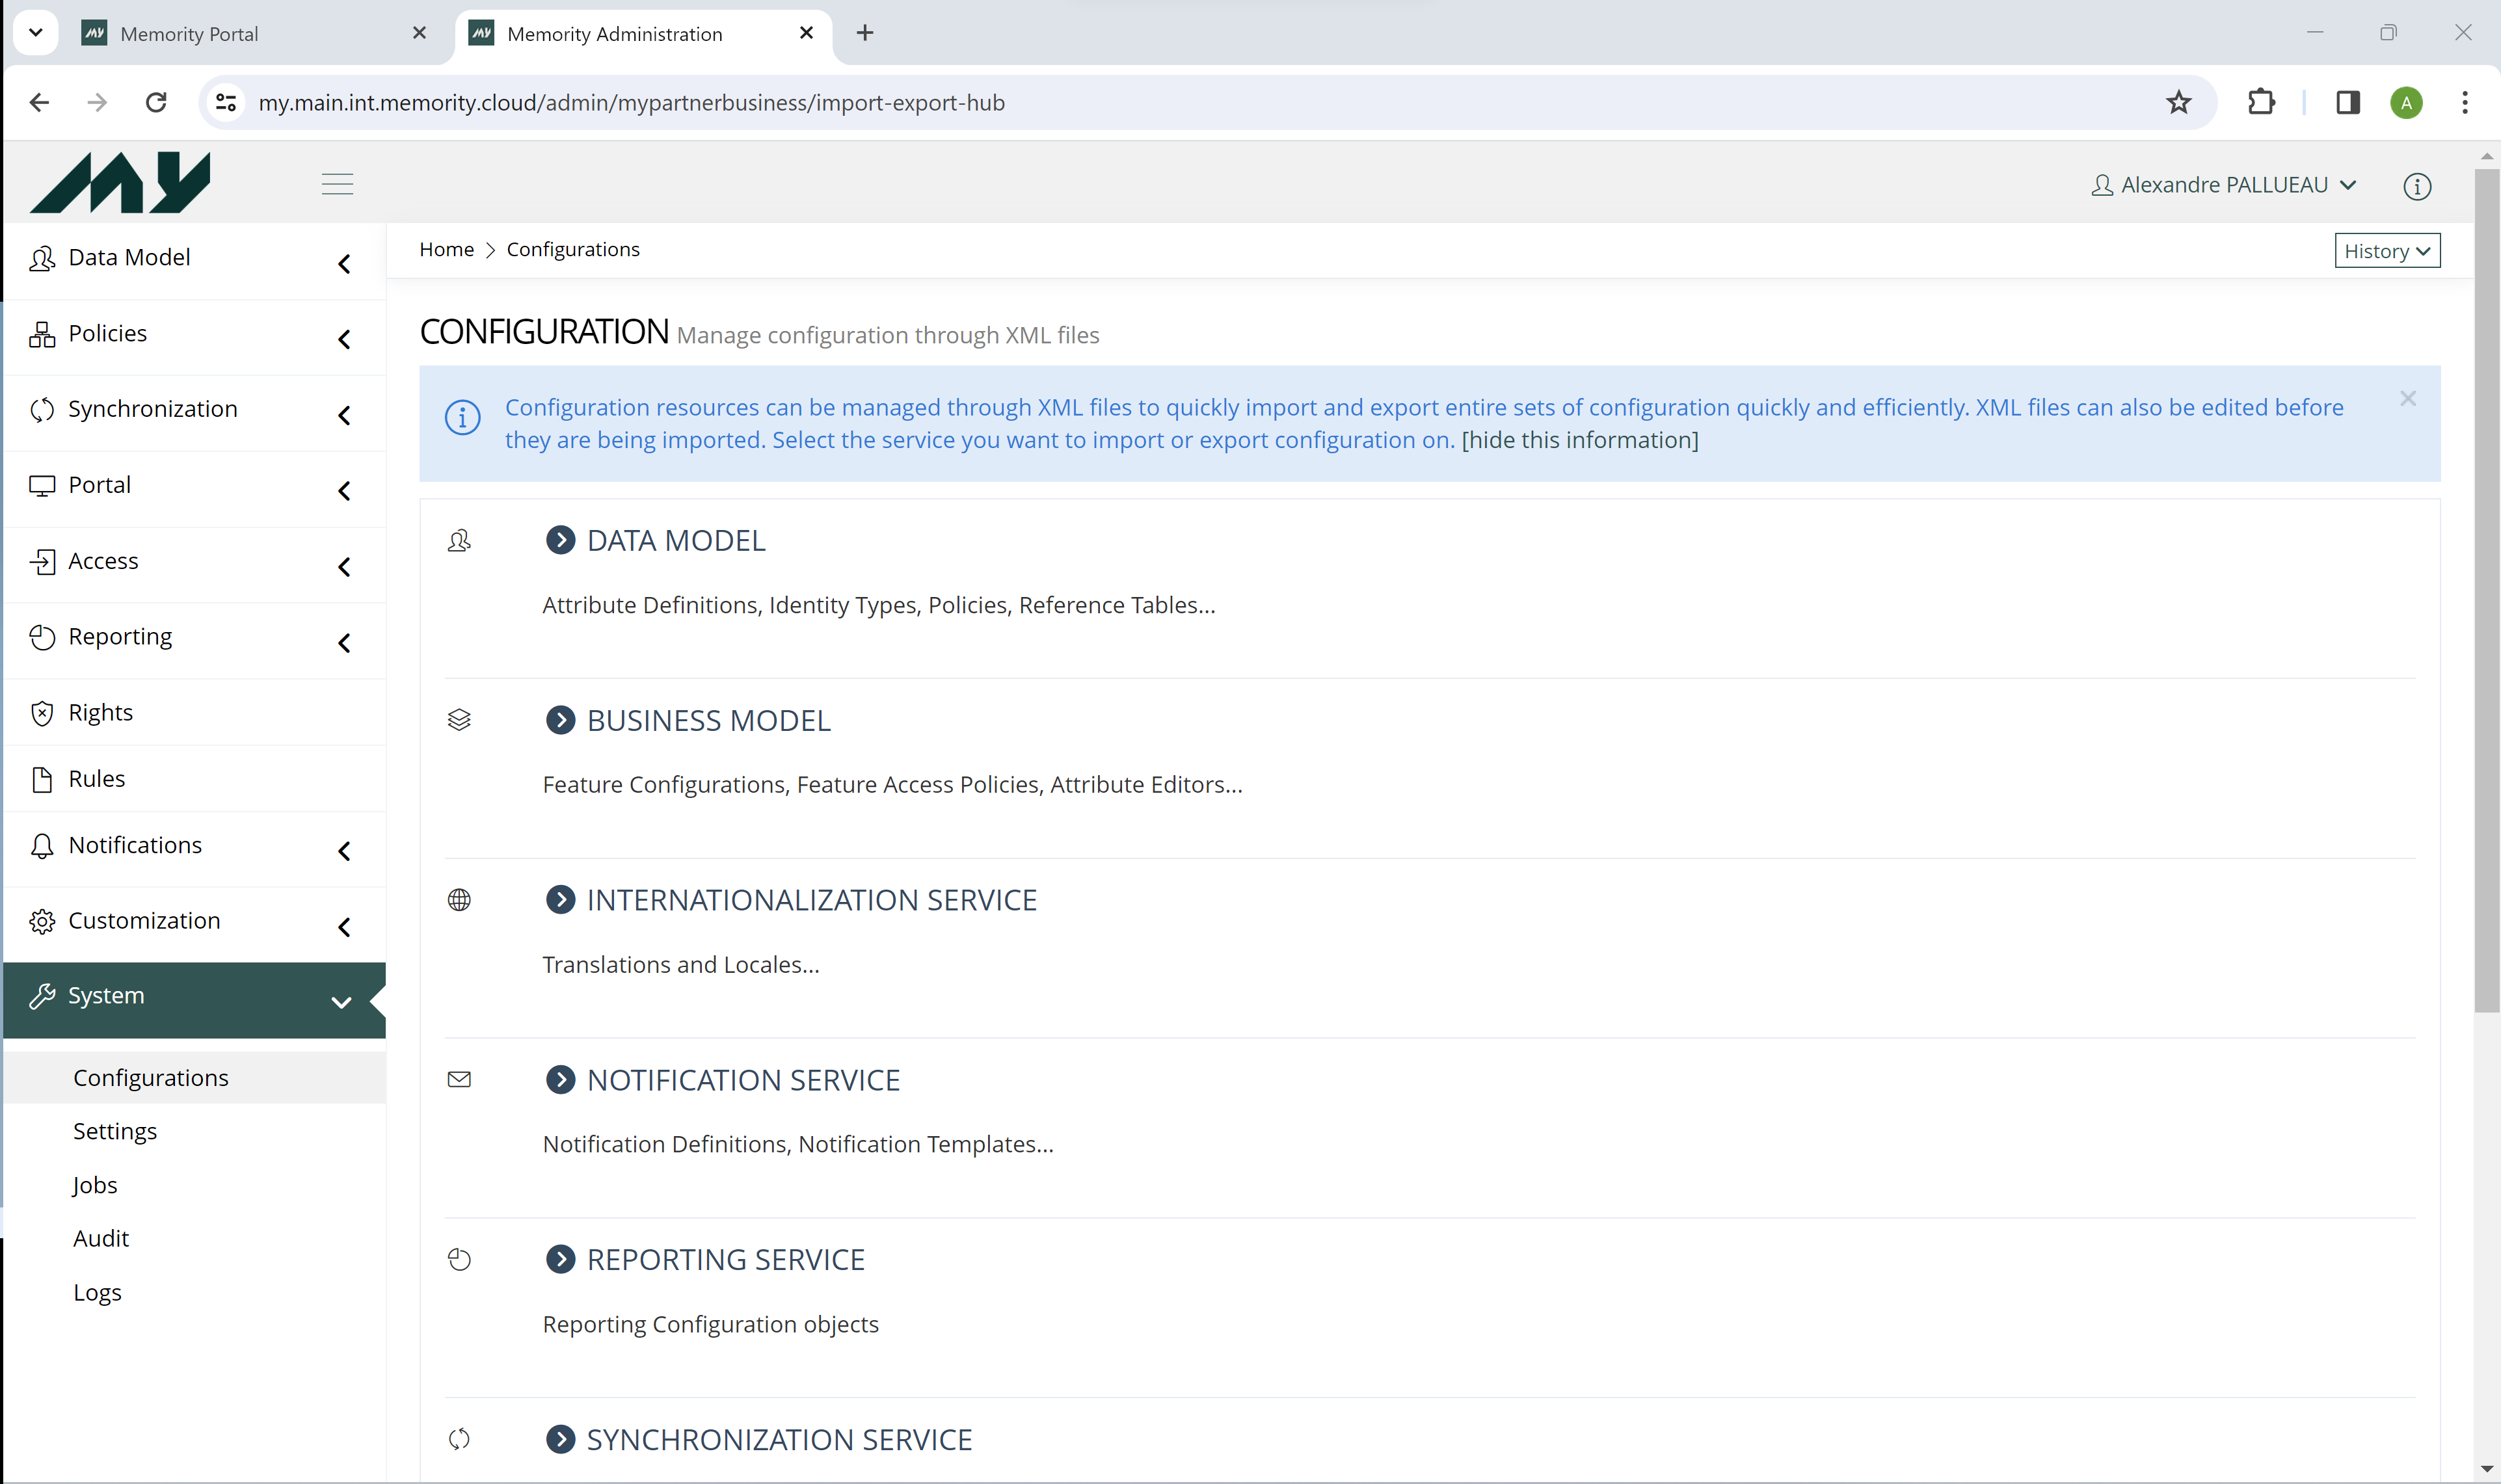
Manual import through administration portal
API
You can manually import and export configurations through Memority native APIs.
To import a configuration for a dedicated service, use the service's API.
Configurations files can be get from "assembly" directory in IntelliJ after a Maven build.
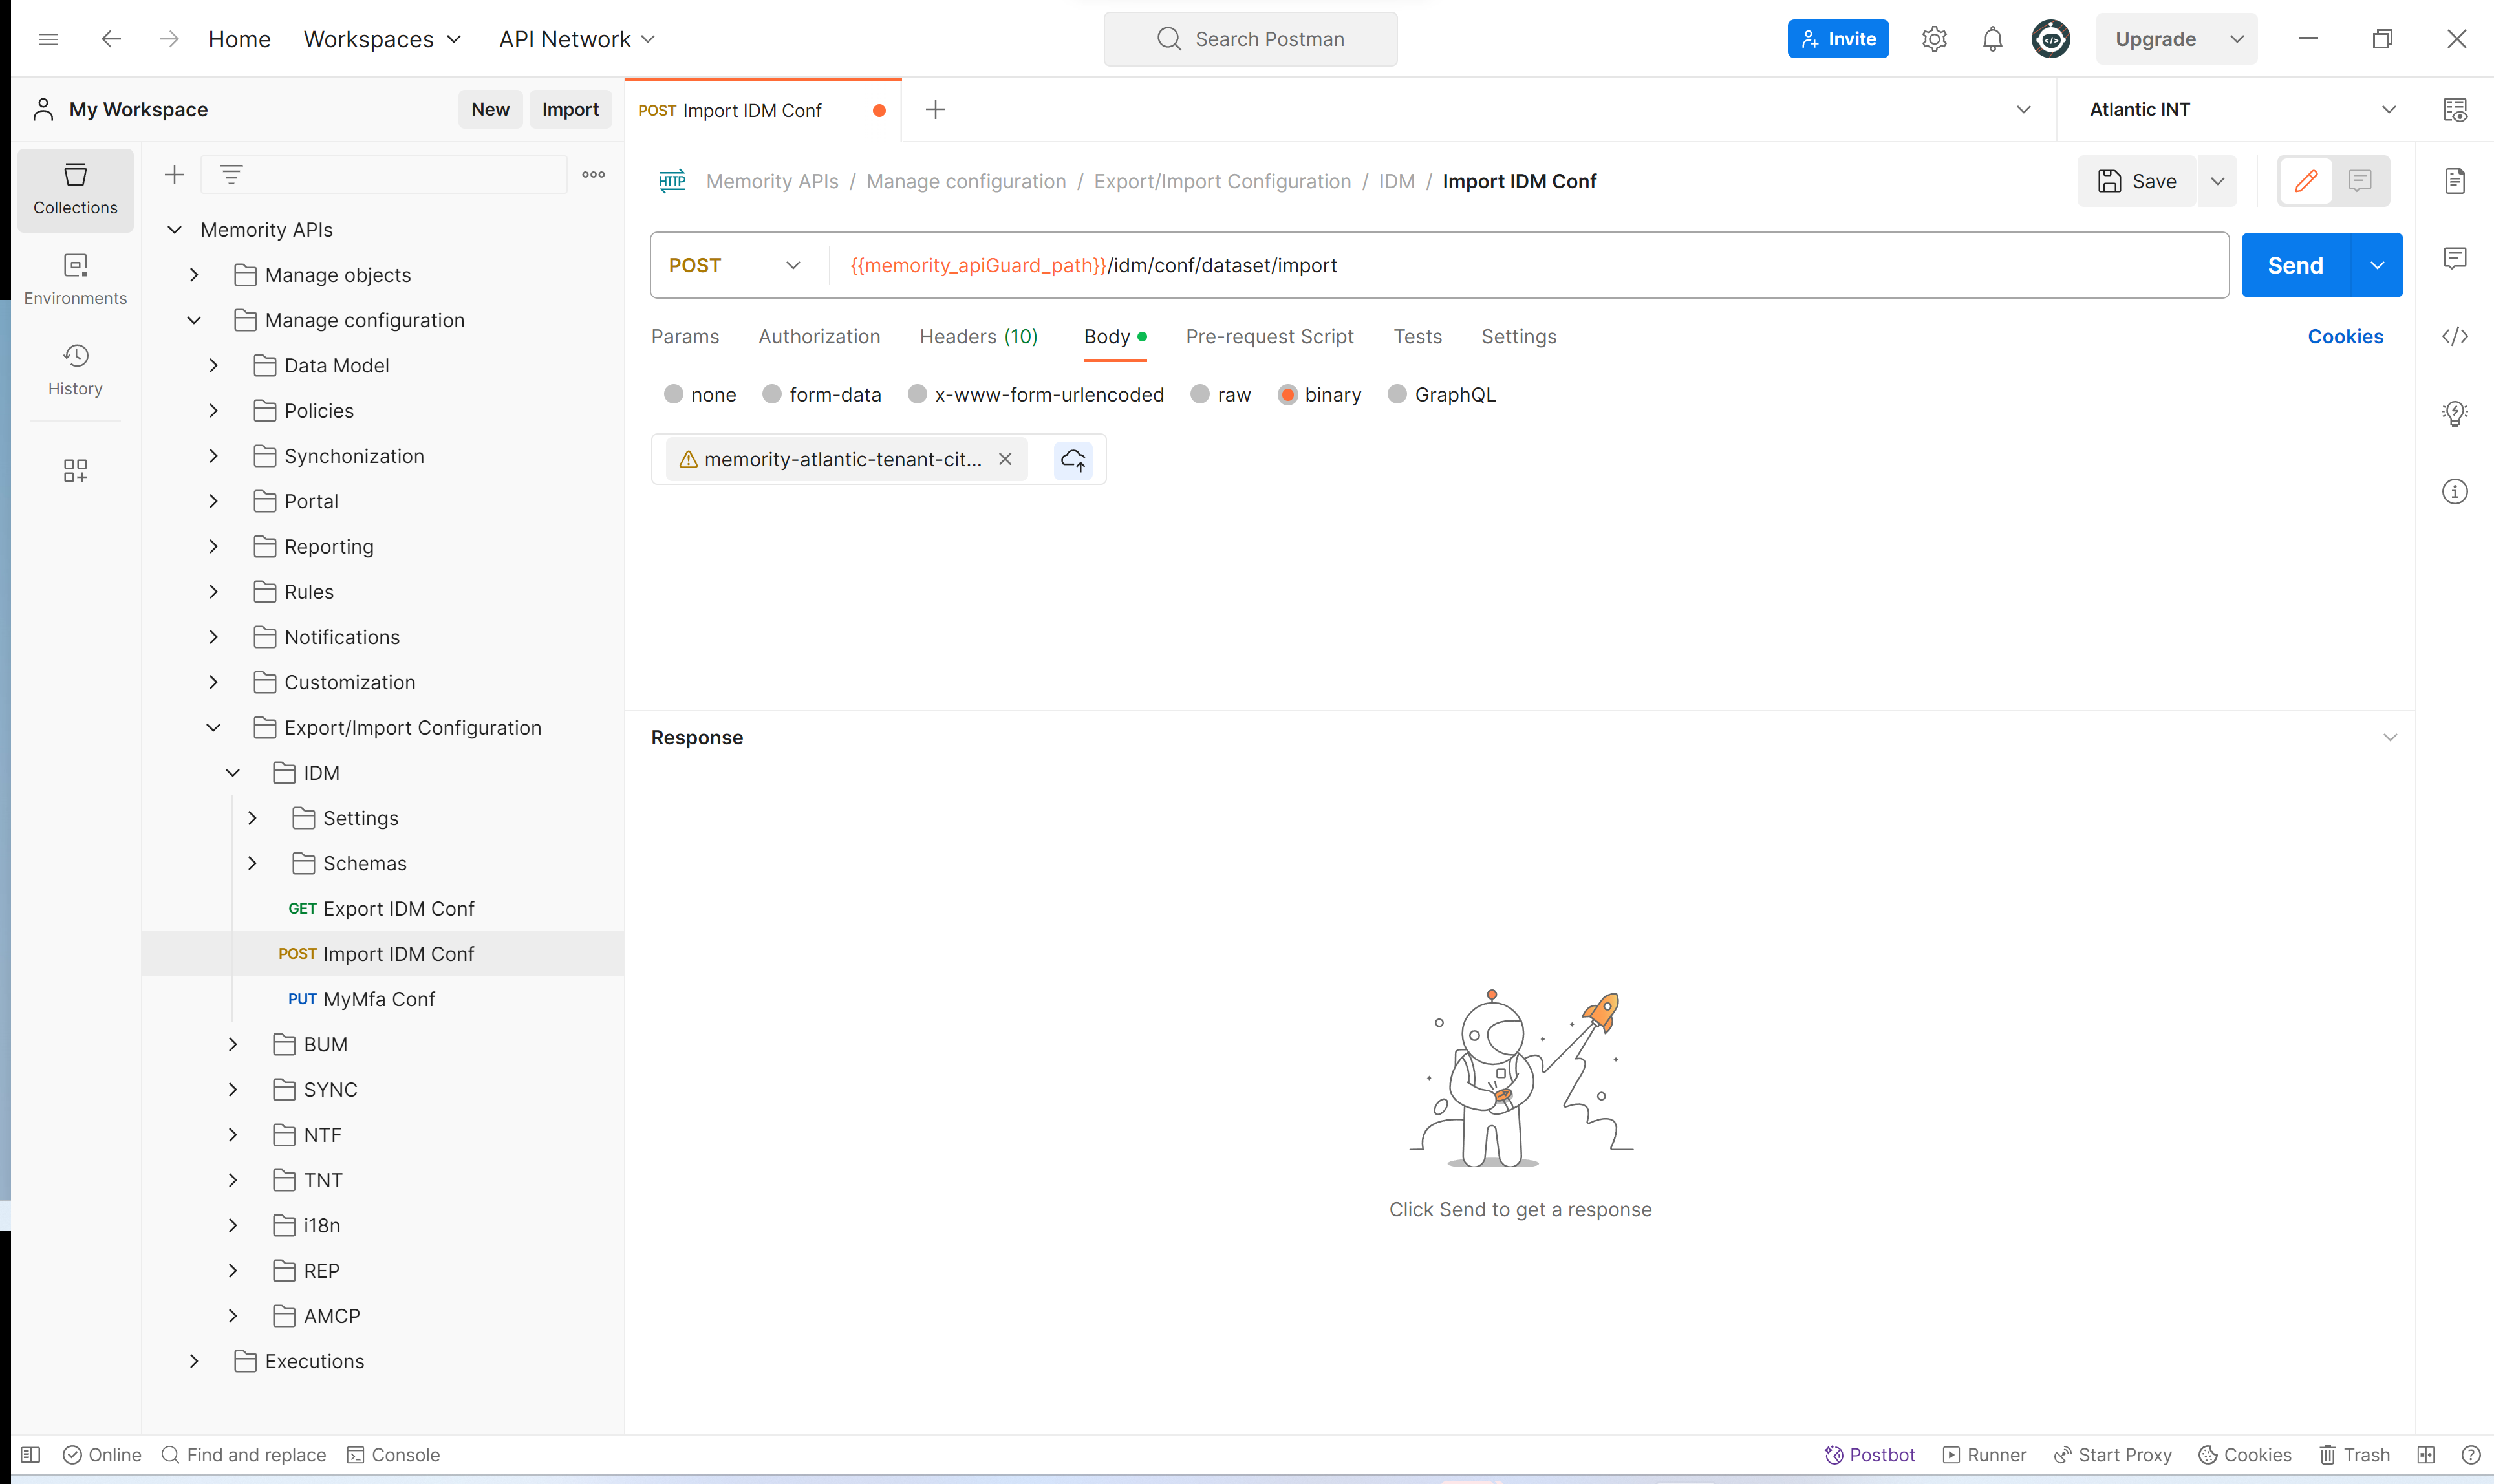
Manual import through APIs